Are you tired of staring at a damaged ceiling and dreaming of a fresh look for your indoor gardening space? You’re not alone. With the rising popularity of indoor gardening, many of us are searching for ways to enhance our environments without breaking the bank or undergoing extensive renovations. This post aims to inspire your creativity with 12 gypsum board ceiling ideas that not only conceal damage but also elevate your home’s aesthetic.
If you’re passionate about indoor gardening or simply want to spruce up your living space, this guide is for you. Whether you’re a seasoned green thumb or just starting your indoor plant journey, the right ceiling can make all the difference. You’ll discover practical solutions that blend functionality with design, ensuring your space is not only beautiful but also encourages your plants to thrive.
In this post, you’ll get a mix of stylish, budget-friendly ideas that breathe new life into your ceilings and help you cover up unsightly damage. From textured panels to faux skylights, these tips will keep your gardening space feeling fresh and inviting. Let’s dive into these innovative gypsum board ceiling ideas and transform your indoor haven!
Key Takeaways
– Innovative Design: Explore creative ceiling designs like textured gypsum board panels and painted options that add character to your indoor gardening space.
– Damage Concealment: Learn how to effectively cover up ceiling damage without the hassle of demo through practical techniques like faux skylights and geometric patterns.
– Functional Aesthetics: Discover how integrating light fixtures and hanging planters can enhance both the beauty and utility of your gypsum board ceiling.
– Easy Maintenance: Find out about vinyl finishes that not only look great but are also easy to clean, making your gardening space more enjoyable.
– Upcycling Ideas: Get inspired by upcycled ceiling designs that not only save money but also provide a unique charm to your indoor environment.
1. Textured Gypsum Board Panels
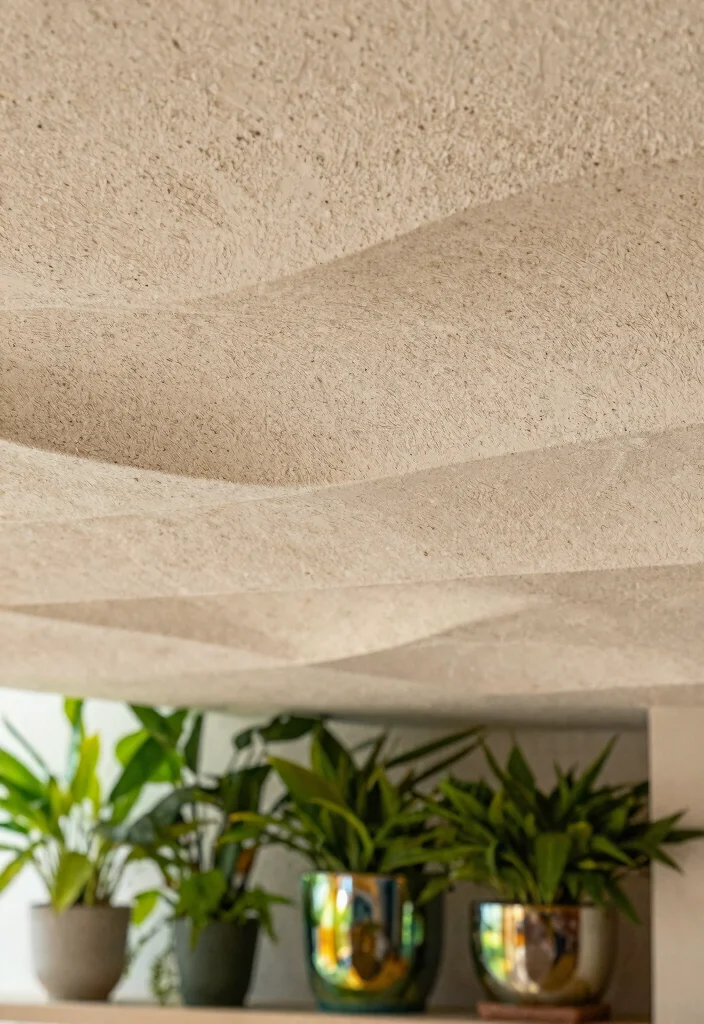
Textured gypsum board panels can transform any ceiling into a work of art, particularly in a gardening space. With finishes like stucco or popcorn, these panels effectively mask imperfections while adding a rich visual dimension. Their rough textures play with light, enhancing the aesthetic appeal of your plants and making the space feel more inviting.
To implement this design, consider lightweight panels that are easy to install with adhesive or screws, perfect for DIY projects. Explore budget-friendly options at local home improvement stores, and remember that textured finishes are on-trend, offering both style and practicality.
Consider these ideas to elevate your ceiling design:
– Pair textured panels with wooden beams for contrast
– Install panels in a staggered pattern for visual interest
– Use light colors to enhance the brightness of your space
– Incorporate ambient lighting to highlight the textures
This design not only conceals damage but also brings a unique flair to your sanctuary, merging function and beauty seamlessly.
2. Painted Gypsum Board for a Pop of Color
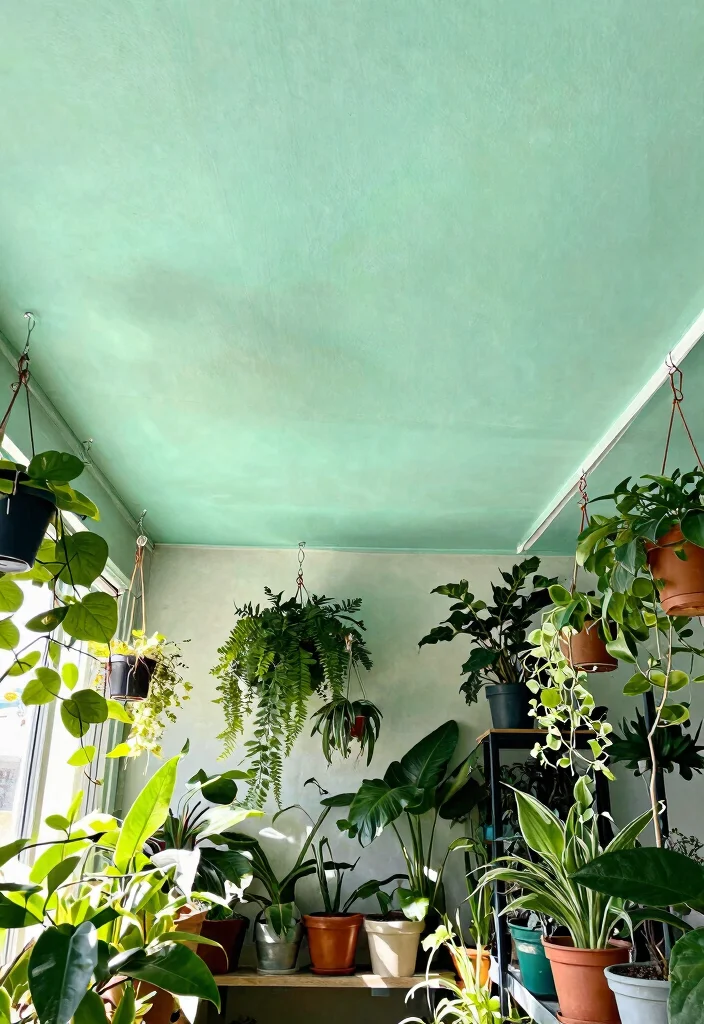
Adding a splash of color to your gypsum board ceiling can dramatically transform the feel of your indoor gardening area. A fresh coat of paint can breathe life into the space, whether you choose bold hues or soft pastels. This vibrant touch not only brightens the room but also cleverly hides any ceiling imperfections.
When painting, think about the emotional effects of color; soft greens and blues can create a calming atmosphere, ideal for relaxation. Use semi-gloss or satin finishes for easy cleaning, ensuring your ceiling remains vibrant over time.
Explore these creative painting techniques:
– Use contrasting colors to highlight architectural features
– Try ombre effects for a soft gradient look
– Incorporate stencils for unique designs
– Add a glossy finish for a modern touch
Painting your gypsum board ceiling is an engaging way to cover up damage while creating a fresh, inviting environment for your plants.
3. Beamed Gypsum Board Ceilings
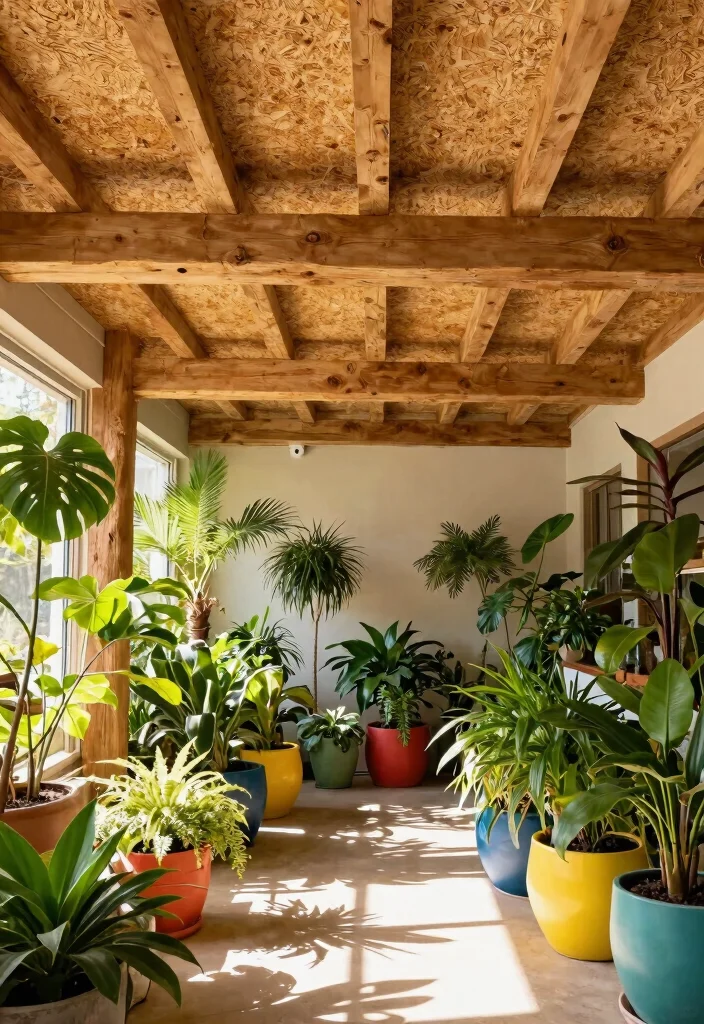
Embracing the rustic charm of beamed ceilings can significantly elevate your gardening space. Gypsum board can be designed to mimic real wooden beams, creating a warm atmosphere that hides any underlying damage. This design adds both character and sophistication to the room.
The combination of smooth gypsum and textured faux beams adds inviting depth and warmth. Beams can also create a sense of height, making small spaces feel more expansive while providing opportunities for integrated lighting.
Consider these design tips:
– Incorporate recessed lighting within beams to illuminate your plants
– Mix matte and glossy finishes for added visual interest
– Use beams to divide spaces without closing them off
– Paint beams in a contrasting color for a bold look
This approach not only conceals damage but also enhances the character of your space, crafting an area that feels cozy and spacious.
Difficulty Rating & Requirements
Overall Difficulty Rating: Medium
Completing a gypsum board ceiling project can be moderately challenging. It requires careful planning, some level of craftsmanship, and the ability to handle tools safely. This project is suitable for DIY enthusiasts with a basic understanding of home improvement. If you have experience with drywall repair or interior renovation, you’ll find this task manageable.
Time Estimate:
⏱ Estimated time: 2-5 days
Here’s a breakdown of the time for major phases:
1. Planning and Design – 1 day
2. Gathering Materials – 1 day
3. Installation – 1-3 days (depending on complexity)
4. Finishing Touches – 1 day
Skill Requirements:
• Required skills: Basic carpentry, drywall installation, painting, and a little electrical work for lighting fixtures
• Beginner-friendly: No, but it is approachable for those willing to learn. You can take on parts of the project, like painting or simple installations, as a beginner.
• Skills that can be learned: Basic drywall installation, painting techniques, and hanging fixtures
• Skills requiring experience: Electrical work and advanced ceiling design techniques
Tools & Materials Needed:
🧰 Essential items checklist:
1. Gypsum board sheets (required)
2. Drywall screws (required)
3. Joint compound (required)
4. Drywall knife and taping knife (required)
5. Paint and brushes/rollers (required)
6. Stud finder (optional)
7. Sanding block (optional)
8. Lighting fixtures (optional, depending on design)
Step-by-Step Overview:
1. Planning (1 day) – Decide on the style of your gypsum board ceiling. Consider patterns, textures, and colors that will suit your indoor gardening space. Measure the area accurately to calculate how much material you need.
2. Gathering Materials (1 day) – Purchase all necessary materials. Be certain to include safety gear like goggles and masks. This ensures you stay protected during the installation process.
3. Installation (1-3 days) – Cut the gypsum board to fit your ceiling and secure it with screws. This can take time, especially if you are incorporating unique designs or lighting fixtures. Pay attention to detail for a professional finish.
4. Finishing Touches (1 day) – Once installed, apply joint compound and sand it until smooth. Paint or decorate as desired. If you are adding fixtures, make sure they are securely attached and properly wired.
Professional vs DIY:
Hiring a professional for ceiling installation can cost anywhere from $1,000 to $3,000, depending on the complexity and size of your project. Doing it yourself can save you money, as materials might only cost between $300 and $700 for the same space. If you’re comfortable handling tools and following safety protocols, tackling this project on your own can be rewarding both financially and creatively. Consider hiring a professional for specialized tasks like electrical work or extensive design features if needed.
4. Geometric Patterns for Modern Flair
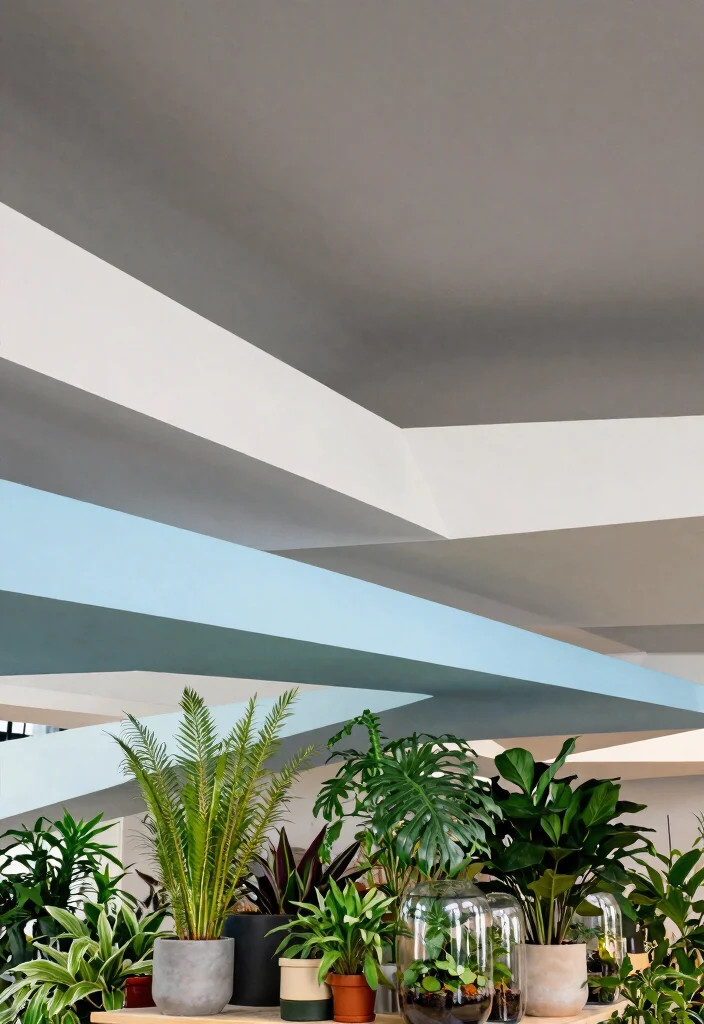
Geometric patterns on gypsum board ceilings introduce a modern twist that can rejuvenate your gardening area. This contemporary design not only serves a functional purpose but also adds an exciting visual element that masks ceiling damage.
By utilizing simple shapes like triangles or hexagons, you can create an eye-catching ceiling that engages the senses. The angles of these patterns reflect light uniquely, enhancing the overall ambiance of your space.
Implement these geometric ideas:
– Mix contrasting colors within the shapes for a playful effect
– Use bold patterns to create focal points
– Incorporate lighting that complements the geometric theme
– Match decor elements with similar shapes for cohesion
This fresh approach can transform an ordinary ceiling into a statement piece while effectively concealing imperfections.
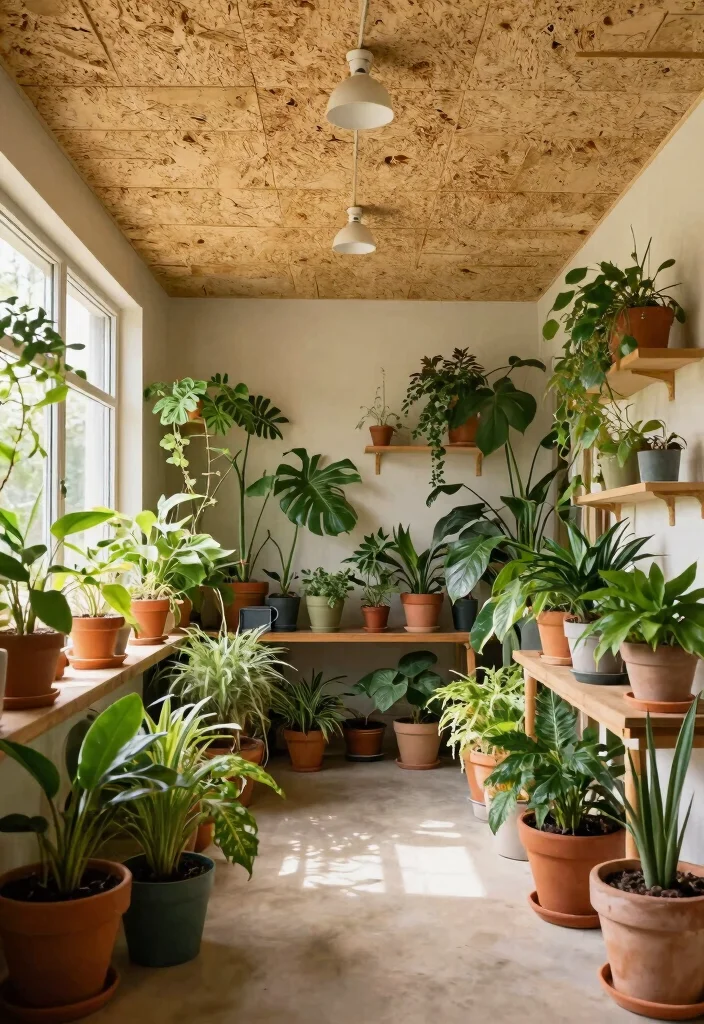
5. Rustic Wood Panels
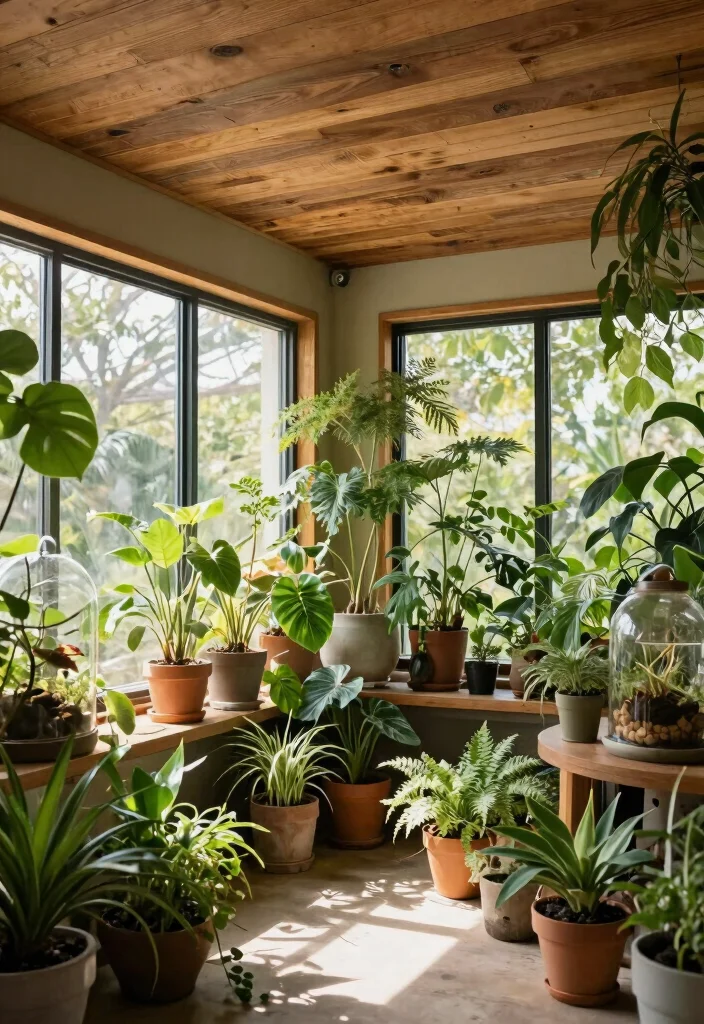
If rustic charm appeals to you, consider wooden gypsum board panels that emulate real wood. This choice not only conceals ceiling damage but also brings an organic feel to your indoor garden, creating a cozy atmosphere.
The warm wood finish beautifully complements green plants, adding texture and depth to your space. You can customize stains and finishes to match your existing decor, making it versatile for any style.
Try these rustic design tips:
– Use horizontal paneling to make the room feel wider
– Opt for vertical panels to create a sense of height
– Combine different wood finishes for added interest
– Ensure moisture resistance for durability in gardening areas
This design elevates your ceiling while fostering a cozy environment that encourages plant growth.
6. Faux Skylights with Gypsum Board
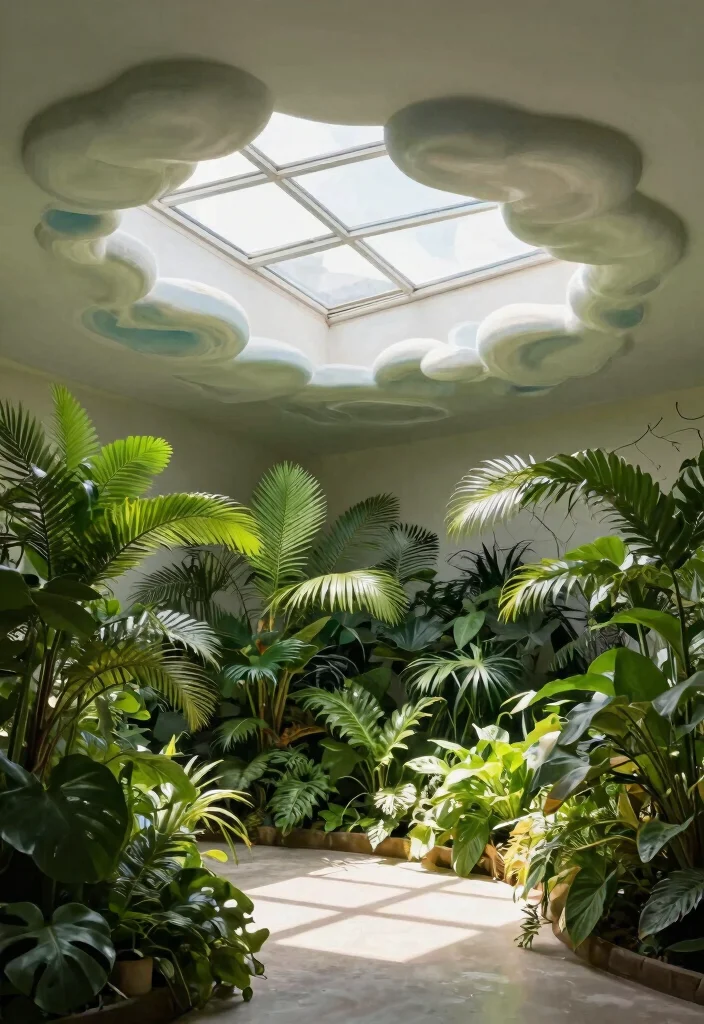
Faux skylights can create the illusion of natural light and open space in your indoor garden. By framing these features with gypsum board, you can cleverly disguise ceiling damage while enhancing the overall atmosphere.
Position faux skylights strategically above your plants to maximize light exposure, and consider layering other lighting sources to ensure your greenery thrives. Decorative trim can add polish to the look, enhancing the visual appeal.
Explore these ideas for faux skylights:
– Create designs that mimic clouds or sun rays for added charm
– Use frosted acrylic to diffuse light softly
– Incorporate plants around the faux skylights for a natural feel
– Paint the edges with bright colors to draw attention
This innovative approach not only hides damage but also brightens your space, creating an inviting atmosphere for your plants.
Fun fact: Faux skylights can visually expand a compact indoor garden by up to 20% in perceived space. When framed with gypsum board, they disguise ceiling damage while boosting natural-looking light for thriving greens.
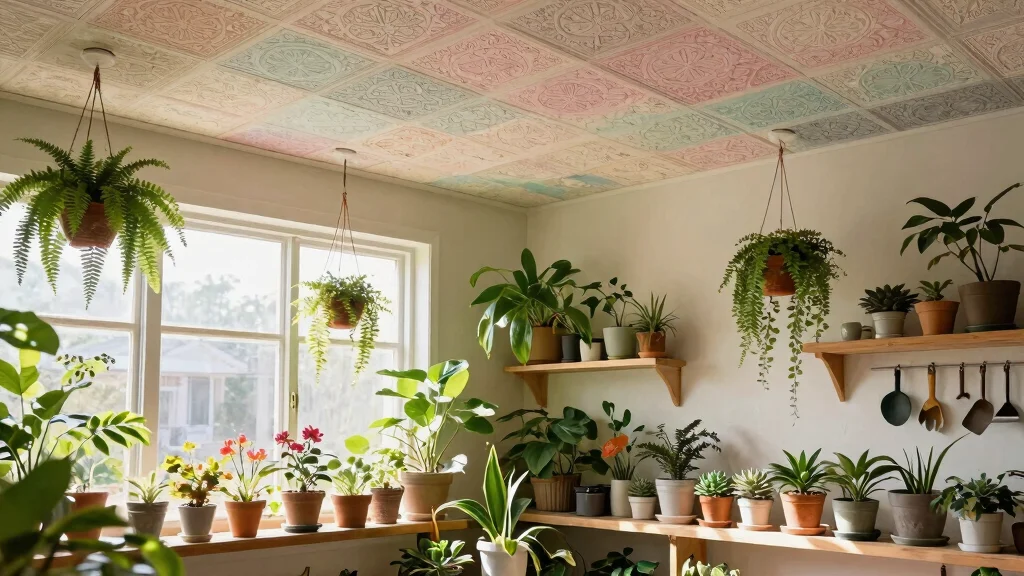
7. Hanging Planter Fixtures from the Ceiling
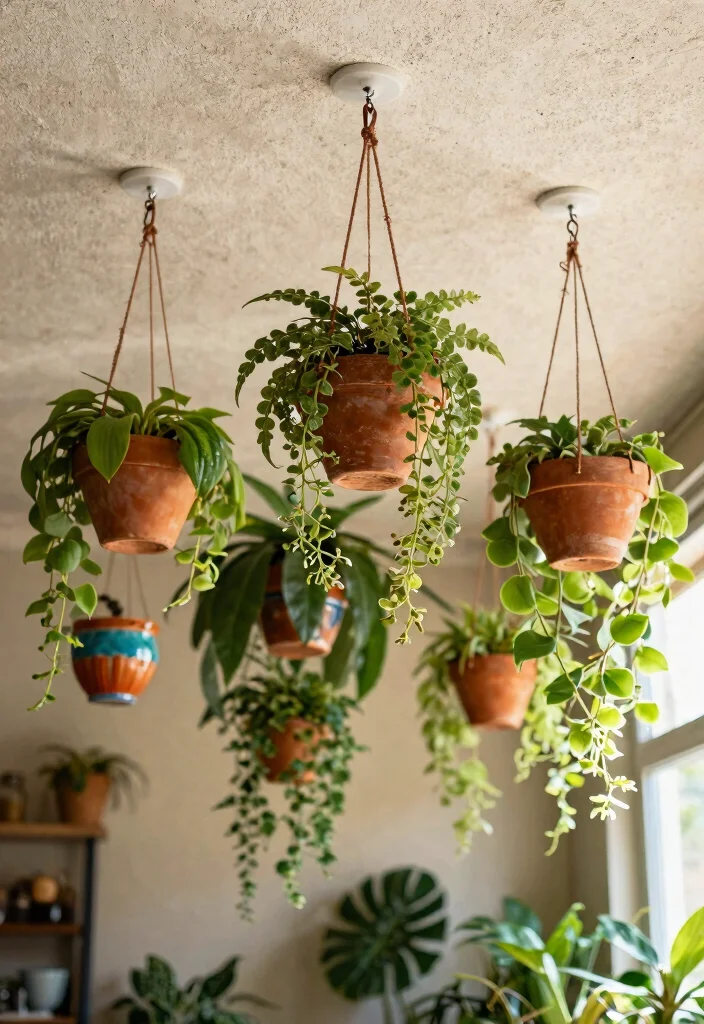
Hanging planters from the ceiling is a fantastic way to maximize space while creating a magical garden vibe. Gypsum board ceilings can easily support lightweight fixtures, allowing you to add vertical gardening with flair.
Utilize macramé hangers or creative metal frames to display your plants attractively. Mixing heights in your arrangements adds dynamism, ensuring easy access for maintenance and watering.
Consider these tips for hanging planters:
– Use colorful planters to contrast against the ceiling
– Arrange plants in clusters for a lush look
– Incorporate LED lights for added illumination
– Ensure secure attachments to avoid accidents
This creative idea not only covers any ceiling damage but also transforms your indoor garden into a vibrant and lush haven.
8. Light Fixtures Integrated with Gypsum Board
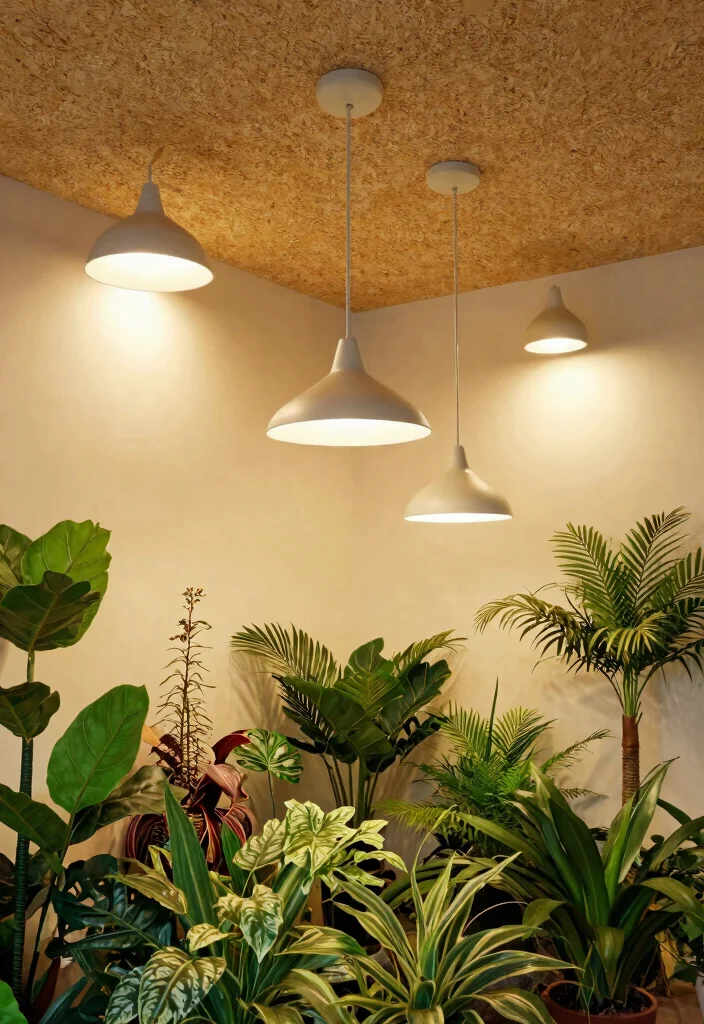
Integrating stylish light fixtures into your gypsum board ceiling serves both aesthetic and practical purposes. Good lighting is essential for plant growth, and creative designs can enhance the beauty of your indoor garden.
Consider installing recessed lights for a clean, modern look or using statement fixtures as focal points. Adjustable lighting options allow you to cater to the specific needs of your plants while adding to the overall design.
Explore these lighting integration ideas:
– Use energy-efficient LED lights to save on energy
– Incorporate dimmable options for flexibility
– Hang pendant lights for additional character
– Choose fixtures that complement your garden style
By seamlessly blending light fixtures with your ceiling design, you can cover unsightly damage while creating a thriving environment for your plants.
Fun fact: Recessed lights in a gypsum board ceiling reduce glare by 60% and can boost indoor plant growth by up to 20% when positioned for even coverage. Keep adjustable fixtures handy to tailor light to each plant’s needs.
9. Vinyl Gypsum Board Finishes for Easy Cleaning
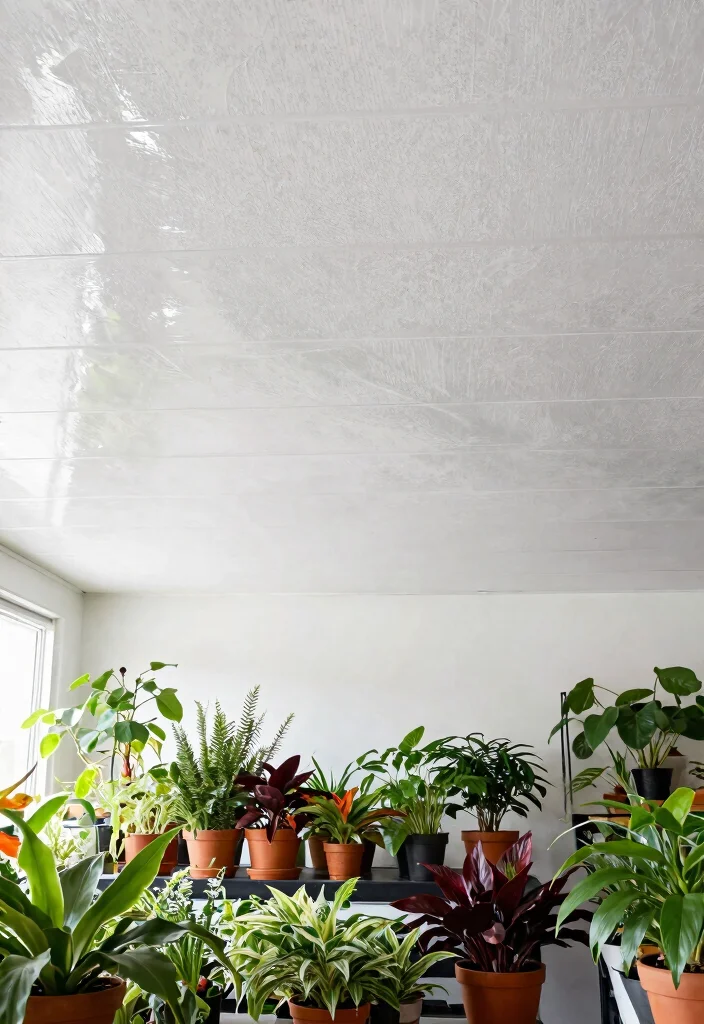
Opting for vinyl finishes on gypsum board ceilings provides a sleek and modern look while simplifying maintenance. This choice effectively covers any damage while enhancing your indoor garden’s beauty.
Vinyl finishes are durable and moisture-resistant, making them ideal for gardening areas. With a variety of colors and textures available, you can easily find an option that fits your design vision.
Consider these benefits of vinyl finishes:
– Enjoy effortless cleaning with smooth surfaces
– Choose eco-friendly options to reduce your carbon footprint
– Mix different textures for a unique look
– Ensure long-lasting durability in humid environments
This practical solution keeps your ceilings looking fresh and appealing while providing the durability essential for an indoor garden.
10. Creative Lighting Effects with Gypsum Board
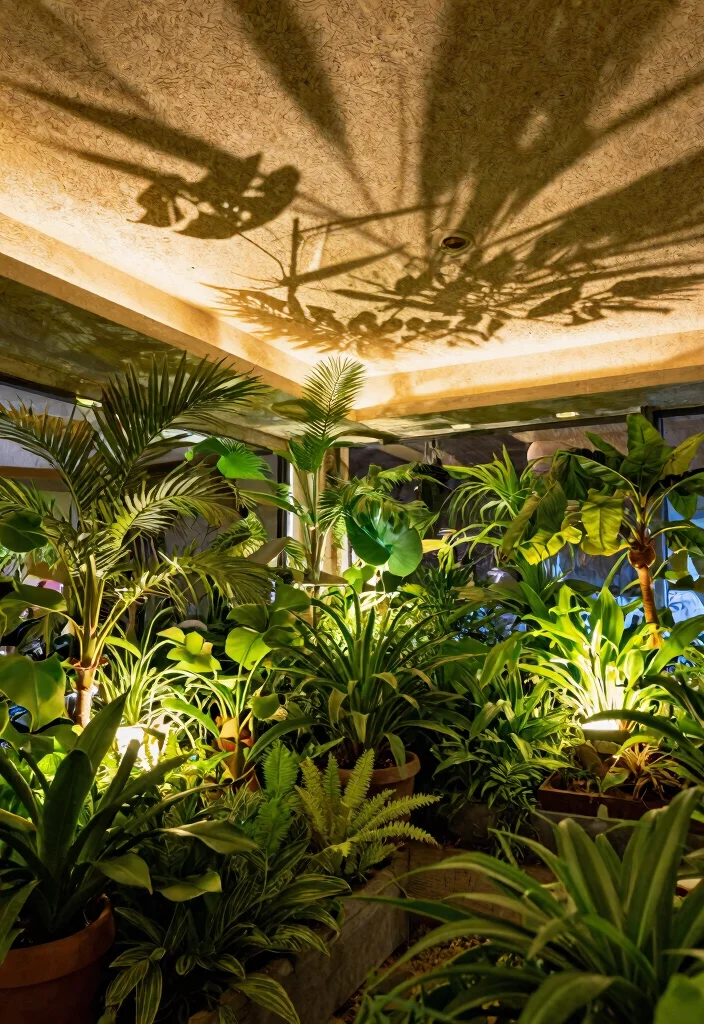
Using gypsum board creatively can yield stunning lighting effects that transform your gardening space. The strategic placement of lighting fixtures can beautifully illuminate your plants while effortlessly disguising any ceiling damage.
Incorporating backlit panels around the edges of your ceiling can create a soft, ambient glow, while color-changing LEDs add versatility to your space. Experimenting with shapes in the gypsum board can cast captivating shadows and enhance the overall aesthetic.
Explore these creative lighting techniques:
– Highlight specific plants with targeted spotlights
– Create a layered lighting effect for depth
– Use dimmers to adjust the mood
– Incorporate natural light sources where possible
This lighting-driven approach allows you to enhance the beauty of your plants while effectively addressing ceiling imperfections.
Fun fact: A backlit gypsum board ceiling can cut harsh glare by up to 40% while softly illuminating your indoor garden. Pair color-changing LEDs with sculpted panels to cast subtle shadows and disguise ceiling damage—no demolition required.
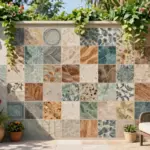
11. Ceiling Tiles Over Gypsum Board

If you’re looking to cover ceiling damage while adding a decorative flair, ceiling tiles are an excellent choice. Available in various styles, from classic to contemporary, these tiles can be adhered easily over existing gypsum board.
Choose intricate designs or sleek modern tiles that align with your decor theme. Many ceiling tiles also offer acoustic benefits, creating a serene environment ideal for relaxation in your indoor garden.
Consider these advantages of ceiling tiles:
– Enjoy easy installation for a quick transformation
– Opt for tiles that require minimal maintenance
– Create a cohesive look with your decor
– Enhance sound absorption for a quieter space
Using ceiling tiles can dramatically change the look of your space while effectively hiding any damage, creating a stunning ceiling that draws attention.
12. Upcycled Ceiling Design
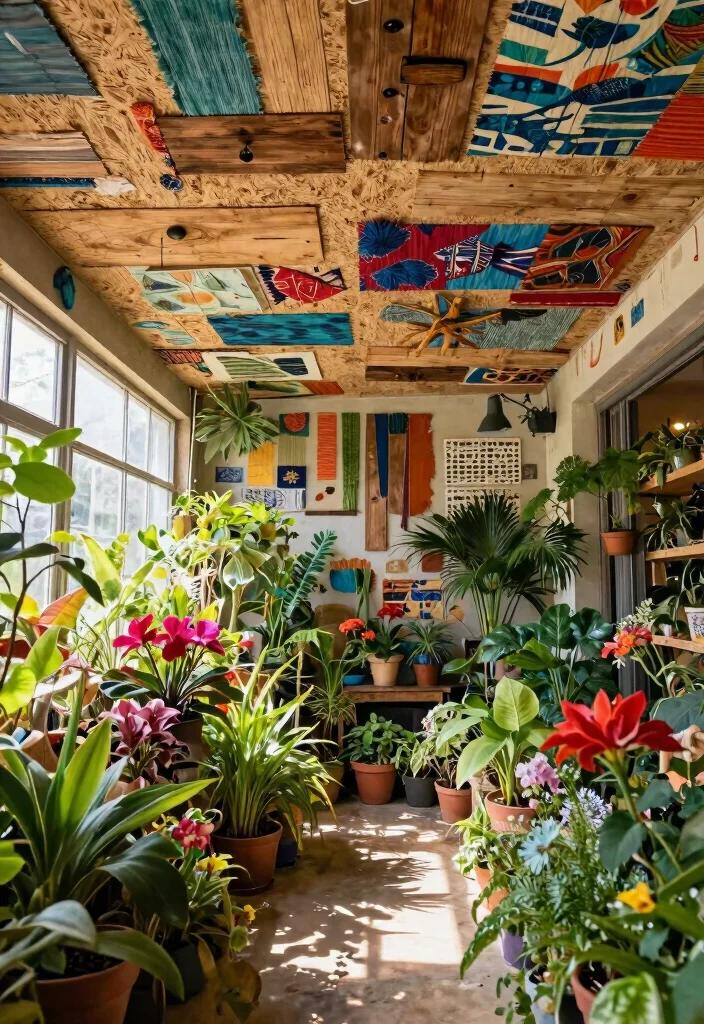
For a unique and eco-friendly option, consider upcycling materials to create an innovative ceiling design. Using gypsum board as a base, you can incorporate reclaimed wood, old tiles, or even fabric to enhance your indoor gardening space while covering up damage.
This sustainable approach promotes environmental friendliness, reducing waste while also allowing for a unique aesthetic. Each piece tells its own story, creating a personalized space that reflects your values.
Consider these upcycling ideas:
– Mix and match different materials for added texture
– Use leftover paint or fabric to tie elements together
– Add personal touches with handmade items
– Explore thrift stores for unique finds
An upcycled ceiling not only hides damage but also creates a distinctive environment showcasing your passion for gardening.
Conclusion
Revamping your ceiling with gypsum board is not just about repair; it’s a fabulous opportunity to express creativity while nurturing your indoor garden. Each idea presented offers a unique way to conceal damage, enhance aesthetics, and invite a sense of tranquility into your space.
As you consider these options, let your imagination guide you to create a ceiling that complements your personal style while fostering a lush environment for your plants. Embrace the beauty of your indoor garden with a stunning gypsum board ceiling that tells its own story.
Frequently Asked Questions
What are the best gypsum board ceiling ideas to cover ceiling damage in an indoor gardening space without demolition?
Covering damage without demolition is about smart concealment with a gypsum board ceiling. Start with a quick damage assessment—if the structure is sound, you can use a damage concealment ceiling system that fits your ceiling design ideas for indoor gardening. Choose moisture‑resistant gypsum boards (green board or Type X) rated for humid spaces. Install a lightweight grid or furring strips to create a clean drop‑ceiling look that hides stains and allows access for future leaks. Finish with mildew‑resistant paint in a light tone to keep the space bright and plant‑friendly, and plan for integrated grow lights and ventilation above the ceiling. This practical approach aligns with home improvement and interior renovation goals while keeping the focus on your gardening area.
How can drywall repair be avoided when upgrading an indoor gardening space with a gypsum board ceiling?
Instead of patching the old ceiling, use new gypsum board panels to conceal the damaged area. First ensure there are no active leaks. Then install a light‑weight furring strip framework or a drop‑ceiling grid over the existing ceiling. Fit moisture‑resistant panels (green board or Type X) and secure with corrosion‑resistant screws. Tape, mud, sand smooth, and finish with a mildew‑resistant paint. This approach minimizes drywall repair while delivering fresh ceiling design ideas for your home improvement and interior renovation project. If some patches remain, you can use removable ceiling panels for easy access without major demolition. Always keep access panels for future repairs.
What ceiling design ideas using gypsum board work best for indoor gardening rooms without harming plant growth?
Opt for design ideas that maximize light, air, and accessibility. Consider a beaded‑board or flat gypsum board ceiling with a lightweight grid for hidden wiring and irrigation lines. A shallow tray or recessed ceiling canhouse LED grow lights, reducing glare and improving light distribution for plants. Use moisture‑resistant panels and bright, reflective paint to boost light feel. Leave space for ventilation and make sure seams are sealed to prevent moisture ingress. These ceiling design ideas help you blend gypsum board ceiling aesthetics with home improvement practicality and interior renovation goals while supporting healthy indoor gardening.
How do moisture and ventilation affect choosing a gypsum board ceiling for a garden room?
Moisture and ventilation are key. In humid indoor garden spaces, choose moisture‑resistant gypsum board (green board or Type X) and seal joints well. Add a vapor barrier where possible and ensure adequate exhaust or circulation above the ceiling to prevent mold and warping. Maintain comfortable humidity levels for plants (often around 40–60%, depending on species) and use ceiling designs that allow air to flow around lights and irrigation. Doing so protects the gypsum board ceiling and supports healthy plant growth, aligning with damage concealment strategies and smart ceiling design ideas for home improvement projects.
What are practical steps to install a gypsum board ceiling for an interior renovation that hides damage and supports healthy indoor plants?
Practical steps start with planning: measure the room, choose panel sizes, and decide between a flush or drop ceiling. Gather materials: moisture‑resistant gypsum board, furring strips or a light grid, corrosion‑resistant screws, tape, mud, joint compound, mildew‑resistant paint, and proper lighting/ventilation for plants. Preparation matters: clear the area, shut off utilities, and locate any hidden leaks. Install the framework first, then hang the gypsum boards, cut around vents, and secure properly. Tape, mud, and sand seams smooth, then paint with a mildew‑resistant finish. Finally, integrate plant‑friendly lighting and ensure access for any future maintenance. This approach delivers damage concealment without demolition and fits neatly into interior renovation and home improvement workflows for indoor gardening spaces.
Related Topics
gypsum board ceiling
drywall repair
ceiling design ideas
indoor gardening
home improvement
damage concealment
creative solutions
easy renovations
budget friendly
minimalist ceiling
quick fixes
beginner friendly