I learned the hard way that studs beat drywall anchors every single time. First, I measure my closet for height, width, and depth, then sketch a wall-to-wall frame with thick supports anchored into studs. I grab 3/4″ plywood, 1×2 boards, my stud finder, and get cutting.
Sanding comes next, filling holes, staining that gorgeous Shiitake exterior, and sealing twice for moisture protection. I level my back supports, screw into studs, and add center braces so nothing sags under winter boots. Five shelves with cubbies sized for flip-flops to tall boots transforms chaos into functional organization. Stop guessing and start building smart. I’ll show you exactly how to do this without destroying your walls.
Measure Your Closet and Design the Layout
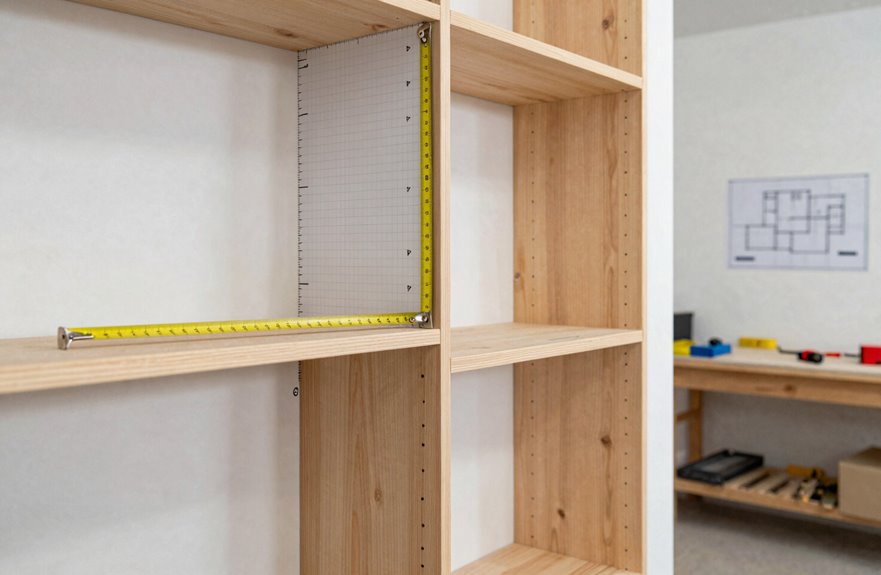
First, I grab my tape measure and record those dimensions: height, width, depth. Your closet layout depends on these numbers. Plan for wall-to-wall frame design with thick supports anchored straight into studs, avoiding flimsy construction that fails under winter coats.
I’m planning five shelves, floor to ceiling, mixing sturdy 1/8 to 3/16 inch plywood bottoms with lighter MDF up top. Pocket screws reinforce the corners, and a center brace prevents middle sag. Remove that wire shelving, spackle the holes, and paint everything Swiss Coffee. You’ll have a solid foundation for your closet system.
Gather Tools, Materials, and Cut Your Shelf Boards

The chaos of my garage is about to transform into organized storage. I’m grabbing my measuring tape, level, stud finder, pencil, plus nails and hammer for marking where this storage space will be built.
For materials, I’m using 3/4 inch plywood for shelves and 1x2x8 boards for supports, plus 1.5 inch finishing nails and screws for joints. My miter box is essential for cutting those supports at precise angles, though my first few attempts looked like abstract art.
I’m planning two large shelves, a tall vacuum zone, and cubbies for toiletries. Pro tip: have Home Depot or Lowe’s cut your plywood shelves if possible. Your installation process will be much faster.
Sand, Fill, and Finish Your Closet Shelves Before Installing

I’ve learned the hard way that rushing into installation without proper prep results in shelves you’ll regret staring at daily. Let’s get these surfaces silky-smooth first. I’ll walk you through my sanding routine, which starts with medium-grit paper on every face and edge, including the undersides you’ll never touch. My favorite trick involves filling those ugly screw holes with spackle so they vanish completely under paint. The result is primer that actually sticks, edge banding that doesn’t peel, and that final whisper-light sanding that makes your finish look professionally sprayed rather than like a garage project gone wrong.
Surface Preparation Steps
Before sliding those shelves into place, prepare the surfaces thoroughly. Fill every screw hole with drywall compound, wait for it to dry, then sand until smooth. Apply spackle to repair walls, then roll on SW Swiss Coffee for a clean, uniform backdrop. For melamine shelves, iron on matching edge banding to prevent chipped edges. This preparation work is essential; poor surface preparation will compromise the final appearance of the closet storage system.
Final Finishing Touches
Why rush to install when a little patience now saves headaches later. These finishing touches transform rough cuts into something you’ll actually want to show off.
First, I fill every screw hole with drywall compound, smoothing it flat like frosting a cake (my technique’s messy but effective). Once dry, I sand until everything feels silky. No splinters catching on sweaters. I’m painting my braces a crisp white while leaving melamine shelves bright and clean, though your closet follows your rules.
For that long top shelf, I rout T joints with my 3/4″ bit, then secure them with pilot holes and brad nails. My brace system wraps both sides with a center bracket fighting bowing. A sagging shelf avalanche won’t happen this way. Back wall braces float free, letting wood breathe.
We’re almost there together.
Locate Studs and Level Your Support Boards

How do you make sure your shelves don’t crash down in six months? You find those studs, friend, and you find them right.
I grab my stud finder, that magical little gadget that beeps when it hits the good stuff, and I slide it along the wall like I’m hunting treasure. Mark every stud with pencil, because drywall anchors are for quitters and we’re building something that lasts.
Once I’ve got my studs mapped, I level my back support boards across the wall, screwing directly into that sweet, sweet wood. Then come the side supports, aligned with those same studs, creating a rock-solid frame.
Here’s what we’re after:
| What We’re Building | Why It Matters |
|---|---|
| Stud-to-stud connection | No sagging, ever |
| Level back supports | Your stuff sits pretty |
| Aligned side boards | Square corners, happy life |
| Solid anchor points | Prevents structural failure |
| True framework | Everything else just works |
We’ve got our bones now, and they’re beautiful.
Hang Your DIY Closet Shelves and Secure Them

I grab my stud finder and slide it along the wall, that satisfying beep telling me exactly where the bones of my house hide. Studs provide the solid anchorage these shelves need. I mark my studs in pencil, then hold my first 2×4 support board against the wall, squinting at my level until that bubble sits between the lines. Once I’ve got my back braces screwed tight into solid wood, not just drywall, I’ll attach the side brackets and finally those shelf frames, building downward so gravity works with me instead of against the installation.
Locating Wall Studs
Because I learned this the hard way, after a very sad Sunday of spackle and regret, locating your studs is the make-or-break moment of this entire project. Grab that stud finder, slide it slow across the wall, and mark those centers with painter’s tape so you don’t lose them. Drywall anchors won’t cut it here.
Here’s my battle-tested approach:
| Step | What You’ll Do | Why It Matters |
|---|---|---|
| 1 | Scan with stud finder, mark centers | Solid anchoring, no tears later |
| 2 | Verify with a level for plumb | Keeps supports straight, always |
| 3 | Install back supports first | Creates your secure foundation |
| 4 | Attach side supports to studs | Square frame, no wobble |
| 5 | Add center brace for big shelves | Prevents that dreaded bow |
This approach builds shelving that lasts.
Leveling Shelf Supports
Once you’ve got those studs marked like treasure on a map, it’s time to actually hang something. I start with the back support boards, screwing them dead level because everything else flows from this backbone. Then come the side supports, plumb as a doorframe, so your closet shelves don’t end up sliding books into a corner like some sad carnival game. Check with your level at every step; no eyeballing allowed. For long spans, pilot-hole first, then brad-nail top supports so nothing splits. Finally, load them up, stand back, and confirm there’s zero wobble.
Securing Shelf Brackets
The moment of truth, folks. Time to hang these shelves and make them stick. I grab my stud finder, that magical little gadget, and sweep the wall until it beeps. I mark every spot with a pencil because these shelves will hold serious weight. I hold my level against the back support board, squinting one-eyed like a pirate, until that bubble sits perfectly. Then I drive screws deep into those studs, feeling the solid bite and knowing this bracket is anchored securely. Side supports come next, keeping everything square so my shelves don’t look like a funhouse mirror. I add center brackets too. I learned this lesson when my last shelf bowed like a sad noodle. This approach ensures sturdy installation.
Add Dividers and Custom Storage Sections
The vertical dividers became anchors for smaller floating shelves, perfect for folded sweaters or that hat collection I swear I’ll wear someday. I slid the big shelves onto support beams, added a center bracket underneath to stop bowing, and stepped back. This closet finally felt organized and functional.
Build Small Cubbies for Shoes and Accessories
Where do all those single shoes even come from? That mystery remains unsolved, but the chaos doesn’t have to. Build small cubbies that fit your actual collection, not some magazine fantasy.
Install a vertical divider first, then attach smaller shelves with finishing nails. You’re creating individual spaces for every sandal, sneaker, and that weird accessory you can’t throw away. The center wall splits everything perfectly, and sliding those shelves onto support beams is satisfying work.
| Cubby Size | What It Holds | My Honest Take |
|---|---|---|
| 6″ tall | Flats, flip-flops | Perfect for summer. |
| 8″ tall | Sneakers, low boots | The everyday heroes |
| 10″ tall | Ankle boots, clutches | Finally, organization. |
| 12″ tall | Tall boots, small bags | Worth every nail |
Your eclectic collection deserves this storage solution.
Stain and Seal for Long-Term Durability
Once those cubbies are nailed tight and your single socks have officially lost their hiding spots, it’s time to make these shelves survive your morning rush. I grab my sander and go to town, smoothing every surface, including those filled screw holes, because stain and seal won’t hide laziness. They’ll spotlight it. I test my stain color on scrap first, making sure my Shiitake exterior works with my Swiss Coffee interior. The result is a cohesive look. For the long-top shelf, I routed precise T joints with my 3/4″ bit, then secured with pilot holes and brad nails. Clean joints mean even stain absorption. Two coats of sealant later, you get moisture-resistant shelves that handle daily use.
Maintain Your Closet Shelves and Prevent Wear
Why let all that sanding and staining go to waste because you ignored a squeaky bracket? DIY closet shelves need consistent maintenance, not just lumber and pocket screws.
| Problem | Fix | How Often |
|---|---|---|
| Squeaky brackets | Tighten into studs | Monthly |
| Scuffed paint | Touch up SW Shiitake | As needed |
| Bowing shelves | Check center bracket | Seasonally |
| Loose edge banding | Re-glue with heat | Twice yearly |
| Dust buildup | Wipe with microfiber | Weekly |
That center bracket I added prevents sagging shelves and extends the life of your storage system. I run my hand along those caulked edges, feeling for cracks, because prevention eliminates costly rebuilds. Your shoe collection deserves a stable foundation. Five minutes of monthly maintenance prevents weekend repair projects.