I’ve sanded engineered hardwood floors dozens of times. You absolutely can sand them, but only if that wear layer—that thin veneer of real hardwood on top—is thick enough to survive the process. Anything under 2mm will sand straight through to the plywood core and ruin everything. Aim for 3mm minimum, with 6mm being ideal for multiple refinishes. Check your specs first before starting.
Grab an orbital sander; never use a drum sander, as it removes material too aggressively. Keep checking for flatness as you go. Cupped boards are problematic because they force you to sand deeper than necessary.
Pick the right finish for your needs. Water-based finishes offer quick turnaround, while oil-based finishes provide that rich, amber glow on darker woods.
The whole process takes about a week before you can return to heavy use. Plan accordingly for a complete transformation of your floors.
Can You Sand Engineered Hardwood Floors?
How often have I stared at my engineered floors, coffee in hand, wondering if I could bring them back to life? The answer is yes, mostly, but there’s a catch that will make or break your project.
That gorgeous wear layer, the thin veneer of real hardwood on top, determines everything. I’ve seen friends dive into refinishing projects, only to sand straight through to the plywood core below. This results in irreversible damage.
Your floor needs enough wear layer thickness to work with. Start with 60-grit paper, testing a hidden corner first, then work to finer grits. Work carefully, because there’s no undo button here. If your floor is cupped or uneven, don’t attempt sanding. Some floors require replacement rather than risk a failed DIY refinishing attempt.
How Thick Is Your Wear Layer?

I’ve learned the hard way that not all engineered floors are created equal, and it all comes down to that precious top layer, the wear layer, that sliver of real hardwood standing between your sander and disaster.
Here’s what you need: at least 3 mm of solid wood on top, or refinishing’s off the table. A friend’s gorgeous 4 mm oak sanded beautifully. A cousin’s budget 2 mm “bargain” required stopping before disaster struck; you could practically see the plywood core underneath. Moisture damage, cupping, or that paper-thin veneer some builders sneak in significantly affects your floor’s durability. Grab your measuring tool, find that spec sheet buried in your files, because your floor’s longevity depends on it.
When to Screen and Recoat Instead of Sanding
I look at my floor and ask, “Is this a full sand situation, or can I get away with something gentler?” First, I check the surface damage. Those shallow scuffs from my dog’s nails, not the deep gouges from when I dropped that cast iron skillet, matter because a screen and recoat only fixes finish-level problems, not wood-level disasters. Then I evaluate the finish condition, running my hand over the dull, cloudy patches where the lacquer’s worn thin but hasn’t broken through, and I measure that precious wear layer with my calipers because if it’s under 3 mm, I’m not risking a sand-through on my mid-century install. When all three line up, light damage, intact finish, and thick enough veneer, I’m reaching for my buffer, not my drum sander.
Surface Damage Assessment
What happens the first time you roll over a deep scratch with your hand and feel that ridge catch your palm? Do you panic, imagining the whole floor needs saving, or do you know exactly what you’re looking at? Running your palm across boards like you’re reading braille, with your heart sinking, is a common first reaction.
That wear layer tells everything. Under 3mm? Step away from the sander. Nearly sanding through a gorgeous maple veneer in a kitchen is a costly mistake that screening prevents. Screening is a gentle buff-and-recoat that removes surface scuffs without threatening that precious substrate.
But cupping and warping require a different approach. Screening won’t flatten that structural issue. Check your floor’s flatness first, measure that veneer honestly (2mm versus 4mm is everything), and grab 100-grit for those light, consistent passes. Your floor will benefit from this methodical approach.
Finish Condition Evaluation
How do you know when you’re staring at a floor that just needs a little TLC versus one crying out for the full treatment? If your wear layer is whisper-thin, think 2 mm or less, full refinishing is basically floor suicide. You’ll chew right through to that plywood core, and nobody wants that heartbreak. But when I’ve got 3–6 mm to work with, and the boards are still flat as a pancake? That’s my sweet spot. Maybe a light screen-and-coat, maybe gentle sanding for those annoying sun-bleached patches by the window. Cupped boards, though? Game over for aggressive sanding. I’ve learned the hard way. Sometimes you just recoat, cross your fingers, and accept the limitation.
Wear Layer Measurement
Where exactly do you draw the line between “yeah, let’s sand this baby” and “whoa, pump the brakes”? I’ve learned the hard way, and I’m saving you the heartbreak.
Your wear layer is everything. I grab my calipers and measure that veneer with this cheat sheet:
| Wear Layer | My Verdict |
|---|---|
| Under 2 mm | Hard pass, screen and recoat only |
| 2–3 mm | Risky territory, proceed with caution |
| 3 mm+ | Refinishing’s on the table, finally |
| Cupped or uneven | Nope, substrate’s waiting to ruin your day |
Even at 3 mm, I’ll check for cupping, that sneaky warp that’ll sand you straight through to plywood. Parquet’s forgiving, but I’ve killed floors I loved by rushing. Measure twice, sand once, and avoid costly mistakes.
Sanding Tools That Protect Engineered Hardwood Veneer

Why risk ruining that gorgeous veneer when standing in your garage facing a clunky drum sander? For engineered hardwood, use a lightweight orbital sander instead. It’s gentle, forgiving, and designed for veneer protection.
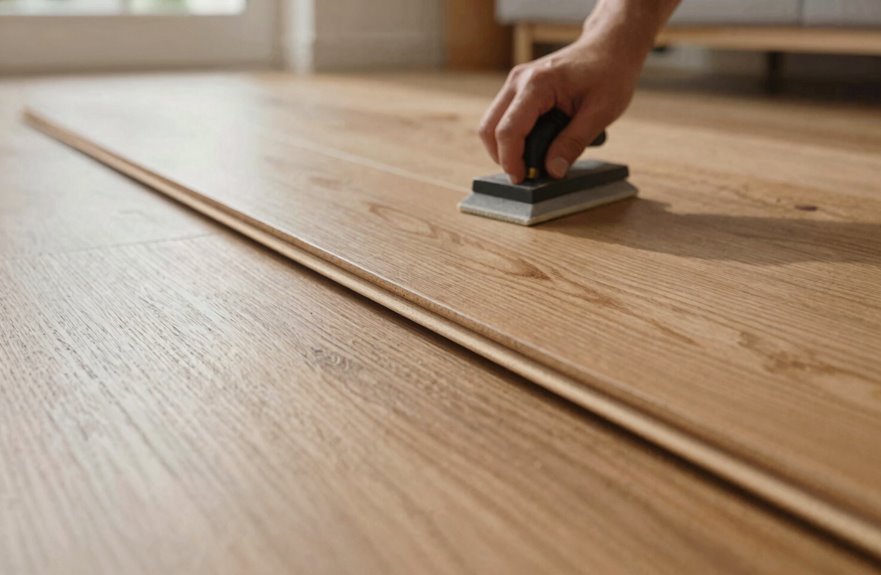
Start with 100-grit paper, enough to bite through that tired topcoat without damaging the surface. Sand with the grain, overlapping each pass like painting a fence, then vacuum every speck before moving to 150-grit. For corners, use a handheld orbital sander.
That thin wear layer is precious, and drum sanders will gouge it. Orbital sanders provide the controlled, gentle motion that engineered hardwood veneer requires. Your floor’s finish will maintain its original appearance and durability with this approach.
What Happens If You Sand Through the Veneer?

I’ve sanded through veneer once, and seeing that pale, striped plywood where rich walnut should’ve been was like accidentally texting my ex at 2 a.m. The exposed plywood isn’t just ugly; it’s a structural nightmare. Once you’ve broken through that thin wear layer, the sublayers soak up finish like a sponge, bubbling and flaking until your “refinished” floor looks like a sunburned snake. If you’re standing there with a sander humming and you’re not completely sure your veneer is thick enough (4 mm minimum), you’re gambling with a very expensive, very visible mistake that no amount of clever throw-rug placement will fix.
Visible Plywood Exposure
How far can you push it before that gorgeous oak veneer disappears and you’re staring at sad, stripey plywood. Wear layer thickness is everything. Under 3 mm, you’re at serious risk. I’ve seen 2 mm veneers vanish like morning fog, and suddenly that “rustic farmhouse” look becomes “abandoned subdivision” in no time. Cupped floors are the sneakiest culprits. Your sander hits those high spots, and plywood exposure appears where you least expect it. I’ve held my breath over 4–8 mm engineered boards, hoping that 3 mm wear layer holds. Parquet fooled me once with its fancy patterns, but engineered flooring doesn’t forgive thin veneers. Measure twice, sand once, or accept the learning experience.
Structural Integrity Compromise
Once you blow through that veneer, you’re not just looking at an ugly floor. You’re looking at a floor with structural compromise. I’ve seen it happen repeatedly.
That thin wear layer is your only protection. Sand through it, and you’re exposing plywood core, watching your floor develop weird hollow spots and cupped areas that catch every shadow. The veneer thickness determines everything. Go below 3 mm, and you’re gambling with disaster.
I’ve learned to measure twice, sand once. Floors with skimpy wear layers, especially 2–3 mm ones, aren’t worth the risk. Even “refinishable” engineered boards can fail if the substrate’s warped underneath. Before I touch a sander, I check wear layer depth, flatness, and alignment. Once that core’s exposed, there’s no coming back, no do-overs. You’ll need to replace the flooring entirely.
Finish Application Failure
So what happens when you push that sander a hair too far and kiss that veneer goodbye. I’ve been there, staring at that ugly plywood core grinning back at me, a total nightmare. That veneer damage isn’t just cosmetic; it’s a one-way ticket to floor replacement, not refinishing. Your wear layer is everything. Mine was barely 3 mm, cupped in spots, and I learned the hard way that thin layers vanish fast. A 6 mm floor allows you to refinish three times. My 3 mm floor allows for one refinish if you’re careful and lucky. Start with 60-grit, check flatness constantly, and when in doubt, call a pro. That mistake costs way more than humility.
How Many Times Can You Refinish Engineered Hardwood?
Why does everyone want a magic number regarding refinishing engineered hardwood. We all crave certainty.
Your wear layer calls the shots. That gorgeous 6 mm wear layer means you’re looking at roughly three refinishes, maybe. Drop to 3 mm, and you’re gambling on one, maybe two if the floor’s perfectly flat. Cupped boards create a disaster waiting to happen because uneven surfaces demand deeper sanding, and suddenly you’ve sanded through the veneer. Game over.
Those trendy 1.6 mm layers should not be refinished. When in doubt, call a professional. Your floor deserves proper care, and so do you.
Water-Based vs. Oil-Based Finish: Which to Choose?
How do you choose between water and oil when both promise to make your floors gorgeous? Staring at samples until your eyes cross is a common experience.
Water-based finishes dry quickly, stay lighter, and won’t produce strong fumes, which is ideal if you’re sleeping in the next room and need fast results. Oil-based takes longer, darkens wood into something richer and deeper, almost buttery. Oil-based ambers walnut floors beautifully, but on pale maple it can look like someone spilled tea everywhere.
For busy hallways with kids and dogs, oil-based offers better durability. If you need low-VOC and quick turnaround, water-based is the better choice. Both require two to three coats, though water-based may need touch-ups sooner in high-traffic areas. Select the finish based on your wood type, household activity level, and how quickly you need the project completed.
How Long Before You Can Walk on Refinished Floors?
When can you finally stop tiptoeing around your own house like a burglar in socks? Everyone deals with this situation, hovering over fresh floors like nervous parents. Here’s the cure time breakdown.
| Activity | When You Can Do It |
|---|---|
| Sock traffic | 24 hours |
| Bare feet welcome | 48 hours |
| Return furniture | 72 hours |
| Full heavy use | 1 week |
| Rug placement | 2 weeks |
Your wear layer thickness matters for how many times you’ll endure this process. Thicker wear layers mean more refinishing cycles ahead. I once waited exactly 25 hours, placed one chair, and left the world’s faintest imprint. Learn from that impatience.
Waiting the full cure time ensures your floors will maintain their finish and appearance for years to come.