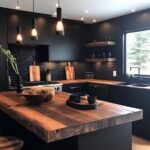

A DIY kitchen remodel can run from paint and LVT to the cost of a full quartz-and-island overhaul, and the deciding factor is how long you can live without a working kitchen.
The projects below split cleanly by that timeline: paint, butcher block, and click-together flooring are weekend jobs that keep the stove plugged in, while quartz counters, waterfall islands, and full-slab backsplashes pull the room off-line for weeks.
What holds the whole list together is that every idea is measured for someone doing the work themselves, not directing a crew; the overage on herringbone subway tile and the monthly re-oiling schedule for edge-grain maple are details you only need if you are the one holding the brush.
1. Paint Cabinets

Painting cabinets costs next to nothing in materials compared with replacement, which is why most DIY remodels start here.
A standard frame-and-panel cabinet with a flat center panel takes paint evenly and hides brush marks better than routed detail ever would.
I would pull the doors and drawers, label each with painter’s tape, and work them flat in the garage.
Deglosser beats sanding through factory finish on laminate fronts, but solid wood takes a light scuff and bonds harder. Oil-based primer blocks the tannins that bleed through light colors on older oak; water-based acrylic-alkyd goes on easier and smells less.
Check your hinges.
If they are the self-closing kind with a built-in spring, paint buildup at the cup will bind them. Mask the hinge plate or accept that you are buying new hardware.

Prepares Surfaces for Painting Without Sanding Helps remove gloss and dull previously finished surfaces to improve paint adhesion. Ideal for preparing cabinets, trim, doors, and furniture before repainting.

CABINET TRANSFORMATION: Refresh outdated cabinets, vanities, furniture and trim with rich Pure White color and a smooth semi-gloss finish

Use to prime interior surfaces such as walls, doors, trim, plaster, concrete and more
2. Butcher Block Countertops

Butcher block brings in warmth that stone or laminate never matches; edge-grain maple or beech runs clean across sink and cooktop cutouts without the cost or complexity of end-grain.
Edge-grain costs less, moves less, and takes a routered groove for drainage beside the sink.
I would seal it with Waterlox or a hardening oil the first weekend, then hit it again monthly for a year.
An undermount stainless sink needs a cut that takes a CNC or a very steady jigsaw hand, so measure twice and order the sink before you cut.
Heat is the real enemy. A trivet beside the cooktop is not optional; a hot Dutch oven will scorch a ring you will sand out forever.

SOLID HARD MAPLE WOOD: 100% genuine North American hard maple hardwood featuring dense edge-grain construction. Built for heavy-duty kitchen chopping, active workbench tasks, and structural countertop use without warping

Solid Wooden Cutting Board: Elevate your food prep with a John Boos R-Board series wood cutting board. It’s ideal for slicing or chopping cured meat, fruit, bread, and vegetables with efficiency.

14 INCH SQUARE END GRAIN BOARD: This 14" x 14" x 1.25" chef's board is crafted from end grain acacia wood, giving you a substantial butcher block cutting board with real heft on the counter.
3. LVT Flooring

LVT, luxury vinyl tile, clicks together over most existing floors without the demolition that real hardwood demands.
Herringbone is a pattern most brands now sell in planks; you lay them in pairs, not single pieces, or you will lose your mind.
I would run a test row from the longest sightline, usually the entry, because herringbone drifts if your starting wall is not square.
Bi-fold doors sit on a track that needs clearance; leave the expansion gap at that threshold and cover it with a matching transition strip.
Spill resistance is the quiet advantage here. The kitchen side sees water, the dining side sees red wine, and LVT handles both without the sealing schedule that wood demands.

Revitalizing blend prevents drying and cracking of hardwoods and bamboo

FOOD-GRADE MINERAL OIL FOR CUTTING BOARDS: Helps restore and protect dry cutting boards, butcher blocks, and wooden kitchen surfaces. Refreshes dull, worn wood and helps prevent cracking or splitting; works on bamboo, teak, acacia, olive wood, and hardwood boards
4. Consider Two-tone Cabinets

Two-tone cabinets split the visual weight so the kitchen does not read as a solid block; putting the dark color down low where hands and shoes actually hit keeps the wear hidden.
Black base cabinets with brass hardware against light uppers is a specific combination that reads intentional, not like you ran out of paint.
I would keep the darker tone on the lowers in any kitchen with standard ceilings; it grounds the room. Glass-front uppers need interior painting or finished plywood behind them, or your mismatched dishes will show through as clutter.
If you are spraying, the two colors mean two masking jobs. Do the uppers first, mask them clean, then flip to the bases.

Sample Purchase: This listing is for a sample piece of our MaxCore TERRA flooring, allowing you to experience the quality and design before committing to a full case.

Sample Purchase: This listing is for a sample piece of our MaxCore TERRA flooring, allowing you to experience the quality and design before committing to a full case.

Chic Design & Wood Texture - Classic herringbone pattern with realistic wood grain texture, combining classic charm with the rustic beauty of natural wood, add a touch of earthy warmth to your interiors.
5. Choose Quartz Countertops

Quartz counters are engineered stone, ground quartz held in resin, so the veining is consistent batch to batch and you can pick your slab from a sample.
I would not attempt the install myself. The material is thick, heavy, and needs seam placement where supports hide the joint.
What you can DIY is the templating; most fabricators accept cardboard patterns if you are precise. An integrated backsplash that is a separate piece, not a coved curve, leaves a seam that is visible but grout-free.

【Size】12"x12" each sheet. 10 sheets pvc marble tiles per pack. Cover 7.7 square feet. Please consider cutting loss 3-5% in every DIY project.

SPECIFICATIONS: 10 sheets peel and stick wall tile, 12.7"x12"x0.12" each, cover about 8.35 square feet. 3-5% extra wastage is recommended in every DIY project. An added BONUS: comes with a pair of gloves to protect your hands from dirt and injury

2-3 Times Thickness: Much thicker than ordinary peel & stick tile, 2mm-2.5mm each, durable and solid tile, unlike soft sticker tiles
6. Subway Tiles Backsplash

Subway tile in herringbone gives a familiar material an unexpected rhythm, and the photo proves it works behind a counter that is already busy with wood grain.
Standard 3 x 6 inch tiles set at 45 degrees eat more cuts than brick pattern; order 15 percent overage, not the usual 10.
I would use a dark grout here, not the white that shows every splash.
The herringbone pattern needs a level centerline snapped both ways, or your focal point drifts. Start at the range hood or the window center and work outward.
A backsplash that stops at cabinet height leaves room for small lamps and framed art on the counter instead of the wall. Full-height to the ceiling is an option, but it doubles your tile and your cutting.

Vertical aerosol for overhead professional projects

Includes 30 featured and newest released color card. Sprayed on color to see our colors in your homes lighting for more accurate color choices.

Use for a variety of indoor and outdoor project surfaces including wood, metal, plaster, masonry or unglazed ceramic
7. Under-cabinet LED Strips
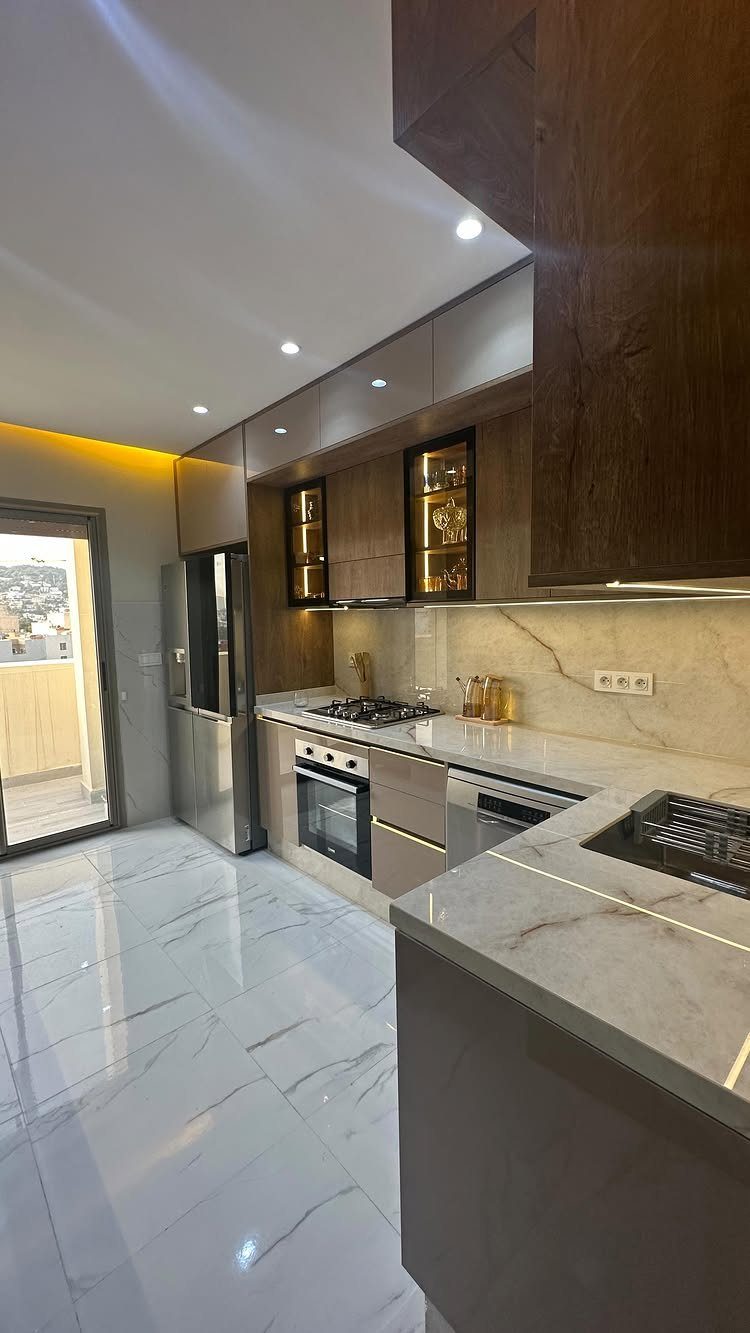
Under-cabinet LED strips give task light where overhead fixtures cast your own shadow across the cutting board. Warm 2700K LEDs match wood grain better than the blue-white of cheap strips.
I would hard-wire to a wall switch if the cabinet run is long; plug-in transformers with in-line switches work for shorter spans but leave cords to manage.
Check that your cabinet bottom is flat; a recessed lip leaves a dark gap the strip cannot bridge.

USA Grown Hardwood: Only made from USA grown hard maple solid wood.
USA Grown Hardwood: Only made from USA grown hard maple solid wood.

Solid Wooden Cutting Board: Elevate your food prep with a John Boos Platinum series wood cutting board. It’s ideal for slicing or chopping cured meat, fruit, bread, and vegetables with efficiency.
8. Reflective Surfaces

Reflective surfaces bounce light around a kitchen that lacks windows, and bronze glass backsplash does it without the cleaning streaks of polished metal. Gloss lower cabinets carry the same idea down to hand height.
I would not mix more than 2 reflective finishes; the countertop, backsplash and uppers here stay in the same warm family.
Tinted glass on upper cabinets needs interior lighting or the contents read as silhouette. The open doorway behind adds depth, but that is architecture, not a choice you can install.

NSF CERTIFIED FOOD GRADE - This premium mineral oil is NSF certified and lab-tested to meet the strictest food safety standards. Colorless, odorless, tasteless, and gluten-free — perfect for cutting boards, butcher blocks, and all food-contact surfaces.

NSF CERTIFIED FOOD GRADE - This premium mineral oil is NSF certified and lab-tested to meet the strictest food safety standards. Colorless, odorless, tasteless, and gluten-free — perfect for cutting boards, butcher blocks, and all food-contact surfaces.

REVITALIZING FORMULA BLEND prevents drying and cracking of hardwoods and bamboo. Great for restaurant cutting boards, great for home kitchens even chef cutting boards. This is the safest conditioner and will rejuvenate and revitalizes cutting boards. Great size for restaurants and industrial kitchens.
9. Bold Backsplash
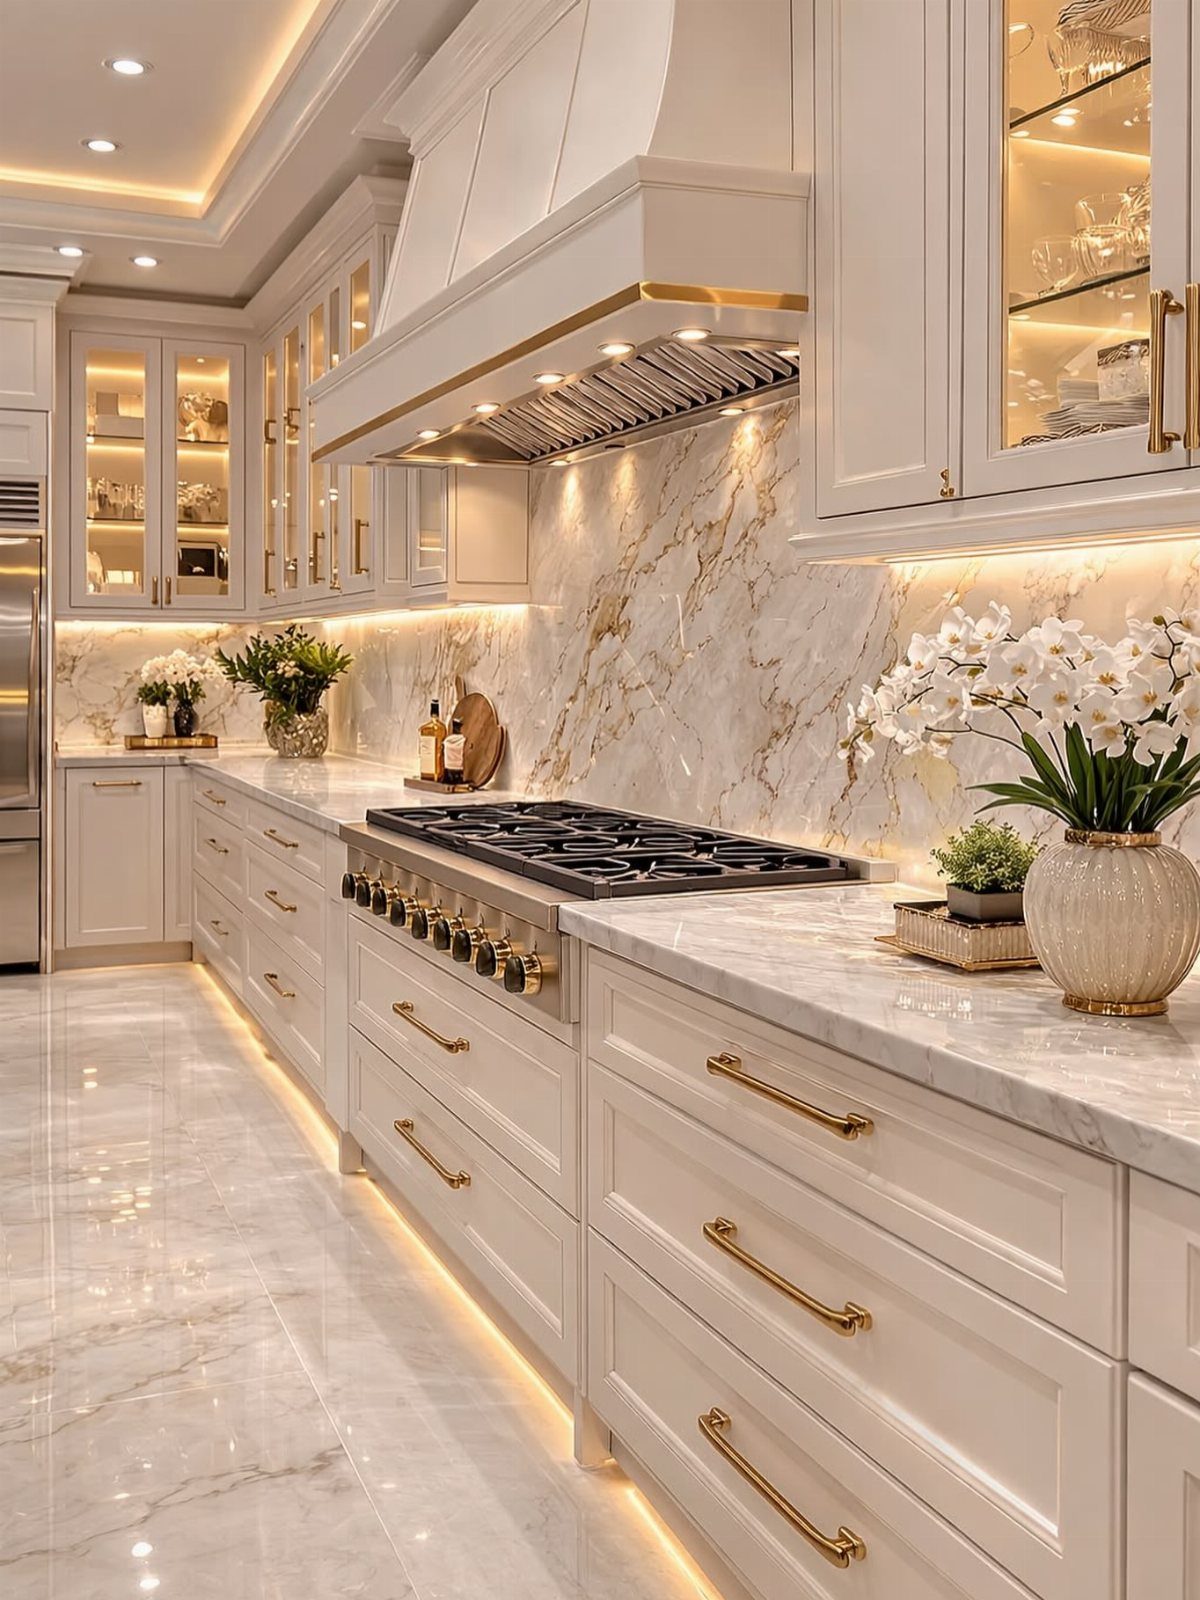
A bold backsplash uses pattern or veining as the kitchen’s single statement so the rest can stay quiet.
I would match the grout to the field color, not the vein; white grout with this stone would chop it into a grid.
Full-slab backsplashes need precise outlet cuts; order the stone templated if your wall has more than 2 switches. The cost runs several times tile, but there is no grout line to stain or reseal.

40 Mil Wear Layer - Twice the commercial standard thickness

40 Mil Wear Layer - Twice the commercial standard thickness

Premium Design-Led Aesthetic: Authentic wood visuals in 4.2” x 23.3” herringbone planks create a beautiful design that elevates any space. Micro beveled edges offer a clean, seamless look.
10. Install Pull-out Shelving

Pull-out shelving turns a deep cabinet into usable space; wire shelves let you see labels from above without pulling every bin forward.
I would measure the cabinet opening, not the interior width, because the frame narrows what actually slides through.
Full-height units need a floor that is level front to back or the lowest tray drags. The black finish here is powder coat, not paint; it will chip less at the edges where the basket wires meet.

🏡 Detail: Qty:4-tiles, White peel and stick backsplash herringbone, 3D subway tile design, easy to clean and cut, made of vinyl & clear gel, waterproof, removable, heat resistant, self adhesive. Size: 12x12 inch/tile, Thickness: 1.0mm.

𝐖𝐡𝐢𝐭𝐞 𝐇𝐞𝐫𝐫𝐢𝐧𝐠𝐛𝐨𝐧𝐞 𝐏𝐞𝐞𝐥 𝐚𝐧𝐝 𝐒𝐭𝐢𝐜𝐤 𝐁𝐚𝐜𝐤𝐬𝐩𝐥𝐚𝐬𝐡 𝐟𝐨𝐫 𝐊𝐢𝐭𝐜𝐡𝐞𝐧
11. Consider Open Shelving

Open shelving forces curation; everything on display has to earn its place. Lit wood shelves hold bowls and trailing plants, not daily dishes that would read as clutter.
I would use a stud finder and lag bolts, not toggle anchors, because stacked ceramic gets heavy fast.
The dimension labels on the countertop are a design detail, not a measurement guide; concrete needs a template either way. One open run is usually enough; pair it with closed storage for the utilitarian stuff.
12. Add a Kitchen Island

A kitchen island adds prep surface and seating where the perimeter counters are too shallow for both. A waterfall edge carries the stone to the floor on one side, which costs more but reads as furniture.
I would allow clearance on all working sides; extra room is better if more than one person cooks together.
The built-in sink here needs plumbing in the slab, so plan that before the flooring goes down. Stools fit better under a longer overhang; fewer is safer in a galley kitchen where traffic passes behind.
Choosing the Right Layout
The first thing I do with any kitchen is measure twice, then measure again.
I take the room’s length, width, and height, then every window, door, and fixed point like plumbing stub-outs and electrical boxes. Those numbers go onto graph paper or a free tool like SketchUp before I move a single cabinet line.
The work triangle still matters. If an island is in the plan, 42 inches of clearance on all sides is the minimum I would accept; 48 feels better when more than one person cooks.
Multiple work zones only matter if more than one person actually cooks at the same time.
Otherwise they spread the kitchen out for no gain. I would rather have one efficient loop than two half-used stations.
Managing the Remodel Timeline
A kitchen remodel runs through phases whether you like it or not: demolition, any structural changes, rough electrical and plumbing, drywall, cabinets and counters, then paint and hardware.
Each phase waits on the one before it, and something always waits longer than planned.
I order materials before I need them, not when I do. A late cabinet shipment leaves me with no storage and no counter, and that dominoes into every trade that follows.
I build at least a week of slack into the schedule between major phases, more if I am ordering anything custom.
The real cost of delay is not just money; it is eating out for a month because the stove sits in the living room.
I plan the work so the kitchen returns to functional as fast as possible, even if pretty comes later.
Costs can range from $14,600 for a small kitchen remodel to up to $41,485 for a bigger renovation.
Hiring Professionals
I know where my own work stops. Electrical and plumbing are the lines I do not cross, and not just because the code says so.
High-voltage wiring and pressurized water lines carry real risk. A mistake there can flood the kitchen or start a fire, and my insurance will ask who did the work.
Licensed trades pass inspection, and that paper trail protects resale value later. I have watched friends save on a plumber by doing it themselves, then spend far more fixing the leak that followed.
What I will do is the prep: opening walls for access, patching drywall after, painting when they are done.
That saves them time and saves me money without touching the parts that need a license. I still check the permit myself, because the fine for unpermitted work lands on the owner, not the contractor.
The rule I follow: if it can kill me, flood the house, or void my policy, I hire it out. Everything else is fair game.
Frequently Asked Questions
How to do a cheap kitchen remodel?
Paint your cabinets instead of replacing them; the materials cost almost nothing compared with new boxes.
I would put one-third of the budget toward cabinets or refinishing, one-third toward countertops and fixtures, and one-third toward installation and labor. Shop around before you start, because costs run away fast once demolition begins.
What is the 3×4 kitchen rule?
I skip the 3×4 rule entirely and work with the work triangle instead: sink, stove, and refrigerator placed so I am not hiking across the kitchen with a hot pot or dripping hands.
Can I take a picture of my kitchen and redesign it for free?
Graph paper or a free tool like SketchUp lets you build a layout from your own measurements without spending anything.
I measure length, width, height, and every fixed point like windows, doors, plumbing stub-outs, and electrical boxes before I move a single cabinet line.