
A single pull-out shelf takes one to two hours and somewhere between $10 and $50 depending on whether you reuse the existing board or cut fresh plywood.
Most builds fail at the measurement stage, because cabinets are rarely square and a ½-inch face-frame overhang will stop the shelf cold if you do not catch it.
The slide hardware itself is the swing cost: about $7 for a pair that sags within months, or $16 for ball-bearing slides that hold 75 to 100 pounds and extend the full depth.
1. Measure Your Cabinet Interior

Width, depth, and height all matter, but width is where a small error turns into a shelf that binds or a slide that misses the wall.
I measure the interior between the side walls at the back, middle, and front, since cabinets are rarely perfectly square.
A face frame that overhangs the opening by even half an inch will stop the shelf from sliding out clean, so I account for that overhang in my depth measurement too, running my tape from the back wall to the inside edge of the frame, not the door.
Most drawer slides are ½ inch thick per side, which means you lose one full inch of usable width once both are mounted.
For a 21-inch-wide cabinet interior, the shelf gets cut to 20 inches. I check the slide packaging to confirm, since some heavy-duty models run closer to ¾ inch, but half inch is the standard I plan around.
The same subtraction applies to depth if the slides mount to a back panel rather than the cabinet rear.

Direct Replacement for Worn or Broken Slides: Designed as a perfect, hassle-free replacement for your existing drawer slides. The common industry dimensions and standard sizing make swapping out old, damaged slides straightforward, restoring smooth drawer operation immediately

【Heavy Duty 100 lb Capacity】 BAIDICE full extension drawer slides are built with 1.0mm cold-rolled steel and dual industrial-grade ball bearings, supporting up to 100 lbs—40 lbs more than standard slides. The precision ball bearing mechanism ensures smooth gliding even under heavy loads, while the built-in rubber crash pad keeps operation as quiet as 35 decibels.
【Heavy Duty 100 lb Capacity】 BAIDICE full extension drawer slides are built with 1.0mm cold-rolled steel and dual industrial-grade ball bearings, supporting up to 100 lbs—40 lbs more than standard slides. The precision ball bearing mechanism ensures smooth gliding even under heavy loads, while the built-in rubber crash pad keeps operation as quiet as 35 decibels.
2. Pick the Right Drawer Slides

Drawer slides are the part that decides whether your pull-out shelf glides smooth or binds after six months of use.
I would skip roller slides entirely; the plastic wheels ride three-quarters extension, so the back of your shelf stays buried in the cabinet, and they bind under any real load.
Ball-bearing slides are what I would pick for almost every kitchen or pantry project. They run 75 to 100-plus pounds, extend the full length, and the bearings hold up over years of daily use.
For retrofitting an existing shelf into a pull-out without rebuilding the box, Euro bottom-mount slides work well. Side-mount slides suit new box-style builds and give the strongest support.
| Slide type | Extension | Load rating | Best for |
|---|---|---|---|
| Ball-bearing | Full | 75–100+ lb | New builds, heavy loads |
| Roller | 3/4 | 35–100 lb | Light-duty, skip for kitchens |
| Euro bottom-mount | Varies | Varies | Retrofitting existing shelves |
| Side-mount | Full | 75–100+ lb | New box-style builds |
Standard lengths run 20 or 22 inches for most base cabinets.
Cost splits at about $7 for cheap pairs and $16 for quality pairs. The cheaper ones cost you twice over in sagging drawers and reinstalls.

Package contains 2 Slides
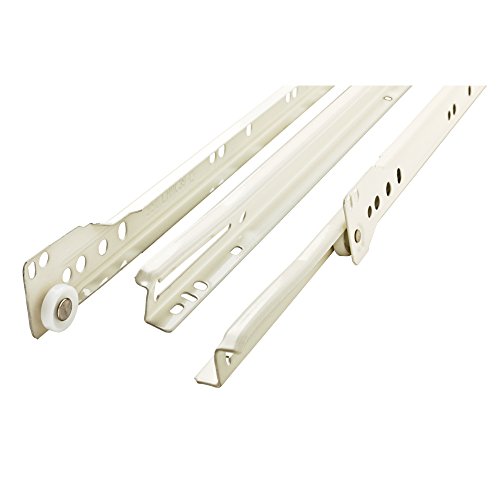
Made from stamped steel with a white epoxy finish
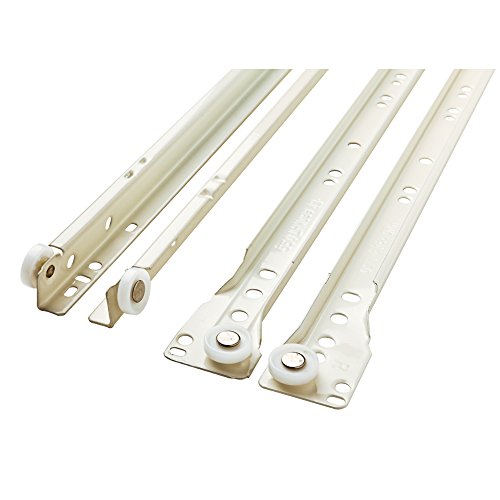
Made from stamped steel with a white epoxy finish
3. Convert an Existing Shelf or Build New

You have two ways to get the shelf itself ready.
Converting an existing shelf saves the cost of fresh plywood and an hour of cutting, which matters when drawer slides already run $7 to $16 per pair and the whole project needs to stay between $10 and $50 per shelf.
Pop out the old shelf, knock off the support pins, and run it through a circular saw with an edge guide to shave the width down.
Trim the depth by an inch so the slides clear the back wall. Flip it upside down before you reinstall; the factory underside is often the cleaner face.
Building from 3/4 inch plywood costs more and takes longer, but you pick the exact depth and width instead of working around whatever the cabinet came with.
You also get to add sides, which keeps tall items from tipping when the shelf rolls out. A table saw or a track-guided circular saw handles the rip cuts fine.
For my own cabinets, I’d reuse anything solid and flat, and only build new if the old shelf is warped, particleboard, or the wrong depth to begin with.

📏 INSTALLATION NOTES — Slide Length:20"(500mm)📐. Fully Extended length:40"(1000mm)🚀. Quantity: 1 pair(2 pieces)🧩. Installation clearance: 0.5"(Each)⚡. Suitable for drawers with an internal depth of ≥ 21"-23"📏. The space between drawer and cabinet wall need to be 0.5in each at left and right side,total 1in ( inside cabinet width - outside drawer width= 1in )⚖️, Mounting screws included🔩

📏 INSTALLATION NOTES: Slide Length:12"(300mm)📐. --Fully Extended length:24"(600mm)🚀. --Quantity: 1 pairs(2 pieces)🧩. --Suitable for drawers with an internal depth of ≥ 13"-15"📏. The space between drawer and cabinet wall need to be 0.5in each at left and right side,total 1in ( inside cabinet width - outside drawer width= 1in )⚖️, Mounting screws included🔩
📏 INSTALLATION NOTES — Slide Length:12"(300mm)📐. Fully Extended length:24"(600mm)🚀. Quantity: 1 pair(2 pieces)🧩. Installation clearance: 0.5"(Each)⚡. Suitable for drawers with an internal depth of ≥ 13"-15"📏. The space between drawer and cabinet wall need to be 0.5in each at left and right side,total 1in ( inside cabinet width - outside drawer width= 1in )⚖️, Mounting screws included🔩
4. Assemble the Shelf Box
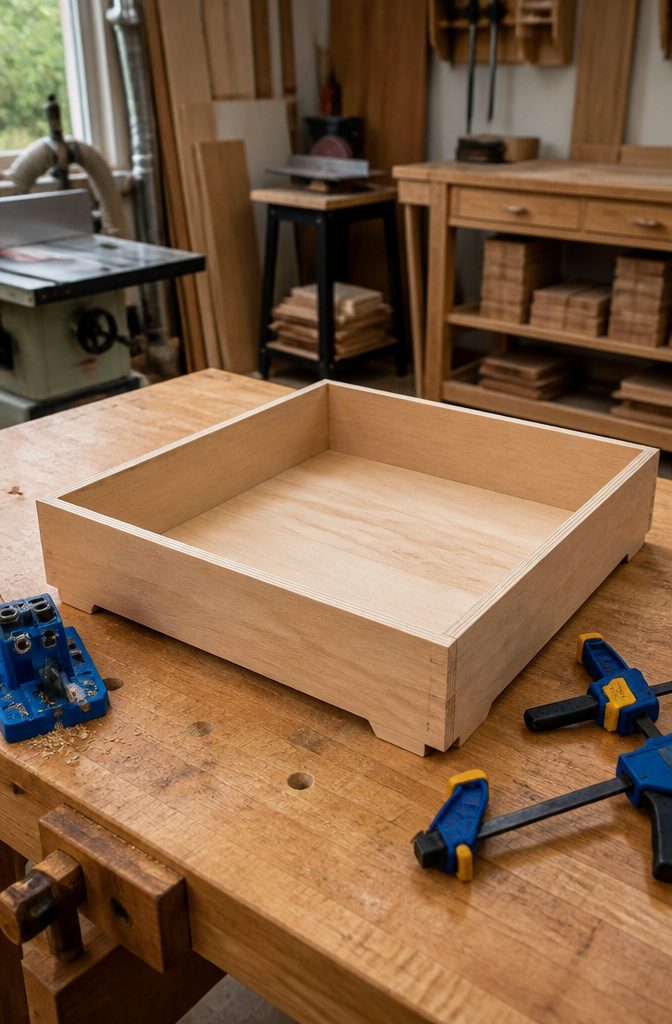
Cut the plywood for two sides, one bottom, and three internal support strips from ¾-inch stock.
The toe kick notches at the front bottom corners should be 3½ inches high by 4½ inches deep, which keeps the box from snagging cabinet frames when you slide it home.
A Kreg Jig drilled into the bottom edges of the front, back, and sides lets you assemble with pocket screws and glue.
Clamp the joints and square the box with a framing square before the glue skins. Let it dry for 30 minutes, then sand the edges smooth.
If you do not own a pocket-hole jig, 1¼-inch wood screws and glue work too. The result is less precise but still effective, and for a pantry shelf that never leaves its cabinet, I would take that trade.
The back lip belongs here, not later. Screw a strip across the rear top edge before you install the slides.
It costs an extra foot of plywood and five minutes, and it keeps cereal boxes from tipping into the void behind the shelf when you pull it past the cabinet face. I would not skip it.

IMPORTANT NOTICE: Our cabinet pull out shelves are not suitable for cabinets with lips.Before ordering, please measure your cabinet dimensions correctly using the method shown in the picture.If your deep cabinet has a lip, please choose from our other drawers options designed for cabinets with a lip available in the store

IMPORTANT NOTICE:Our cabinet pull out shelves are not suitable for cabinets with lips.Before ordering,please measure your cabinet dimensions correctly using the method shown in the picture.If your deep cabinet has a lip,please choose from our other drawers options designed for cabinets with a lip available in the store

1 Tier Sliding Wire Basket: Organizing your cabinet space just got easier with the OCG slide out cabinet organizer. Now you can make the most of cabinet space and easily access all your pots, pans, small kitchen appliances, cleaning products, canned goods, and other items.
5. Install the Slides Level and Square

The cabinet-side brackets mount to spacer blocks in face-frame cabinets, where that 1×2 frame typically extends ¾ inch to 1¼ inches past the side wall. Without those blocks, the slide sits proud of the opening and the shelf geometry goes wrong fast.
An eighth of an inch off level is enough to make a pull-out shelf stick or chatter every time you reach for a mixing bowl.
Frameless European-style cabinets skip this step entirely; the sides already sit flush with the opening, so the slide mounts direct. Either way, a level is non-negotiable.
I run one along the cabinet wall to check plumb and parallel before a single screw goes in, because uneven cabinet sides guarantee misalignment down the line. Center your screws in the adjustment slots while you’re at it.
That small bit of play lets you shift the slide forward or back later without drilling fresh holes, which matters when the face-frame lip catches the shelf edge on the first test slide.

【High quality, more durable】 The drawer slides is made of 1.2mm thickness high quality cold rolled steel and industrial solid steel ball,which take 100,000 times push-pull tests without damage. The maximum load weight is up to 100lbs. REGUDA is committed to produce sturdy and durable drawer slides .Besides the quality,we also focused on after-sales service,any quality or installing problem please feel free to contact us.

Soft Close Feature: These drawer slides come with a hydraulic damper for a smooth closing. Plus, with their double spring design, they move quietly, bringing a cozy and peaceful vibe to your home or project.

ULTRA-QUIET SOFT CLOSE SYSTEM: Engineered with a double-spring mechanism and a hydraulic damper, these soft close drawer slides ensure a whisper-quiet, smooth, and gentle closure every time, preventing cabinet slamming and protecting your home environment
6. Add the Back Lip and Finish

A back lip keeps cereal boxes and mixing bowls from tipping off when you yank the shelf out fast.
I rip a strip of scrap down to about ¾ inch by 2 inch and screw it across the rear edge, flush on top so nothing catches.
Takes maybe ten minutes if the glue is still wet from assembly, twenty if you are driving back to the garage for another clamp.
Finishing is where I usually talk myself out of the extra hour, and I am almost always wrong. Danish oil darkens plywood just enough to hide the cheap edge, or paint matches whatever the cabinet face already wears.
Either way, the lip and the finish together run about an hour and roughly $10, mostly for the bit of slide hardware you already bought.
Skip it and you will chase a rolling pin off the back ledge inside of a week.
📏 INSTALLATION NOTES — Slide Length:16"(400mm)📐. Fully Extended length:32"(800mm)🚀. Quantity: 1 pair(2 pieces)🧩. Installation clearance: 0.5"(Each)⚡. Suitable for drawers with an internal depth of ≥ 17"-19"📏. The space between drawer and cabinet wall need to be 0.5in each at left and right side,total 1in ( inside cabinet width - outside drawer width= 1in )⚖️, Mounting screws included🔩
【Heavy Duty 100 lb Capacity】 BAIDICE full extension drawer slides are built with 1.0mm cold-rolled steel and dual industrial-grade ball bearings, supporting up to 100 lbs—40 lbs more than standard slides. The precision ball bearing mechanism ensures smooth gliding even under heavy loads, while the built-in rubber crash pad keeps operation as quiet as 35 decibels.

【Heavy Duty 100 lb Capacity】 BAIDICE full extension drawer slides are built with 1.0mm cold-rolled steel and dual industrial-grade ball bearings, supporting up to 100 lbs—40 lbs more than standard slides. The precision ball bearing mechanism ensures smooth gliding even under heavy loads, while the built-in rubber crash pad keeps operation as quiet as 35 decibels.
7. Test with Real Weight Before Calling It Done

Run the shelf in and out about twenty times before you load it. Ball-bearing slides need a break-in period, and any tiny burr on the rail will announce itself as a catch around the fifth or sixth pass.
If the box binds, the screws are still forgiving enough to shift the slide a quarter inch and re-drill. I would rather find that now than after the back lip is on.
Load it with what you actually store, not a couple cans of soup for show.
A shelf that glides empty can sag or twist once the weight is real, especially if you built from ¾ inch plywood and the span is wide.
The back edge is where sag shows first; watch for the front corners lifting or the slide brackets starting to torque.
If the shelf does not extend fully under load, shorten the depth by ½ inch and retest. The half inch costs you almost nothing in storage and buys you smooth travel when the box is full.

Great for replacing used or damaged drawer slides on bedroom and office furniture

5 pairs of steel slides with white finish

Cost-Effective Center Mount Design with Stability Advantage: Design: Bottom (center) mount installation. Advantage vs Side-Mount: Provides superior stability with an adjustable bracket, often at a more economical price than many side-mounted slide systems. Benefit: A budget-friendly choice without compromising on reliable performance
What This Costs

Drawer slides are the swing variable in any pull-out shelf budget. A cheap pair runs about $7, while a quality pair sits closer to $16.
That single choice decides whether your shelf glides smooth for years or starts sagging by month three. I would spend the extra nine dollars every time, but the $7 pair works if the shelf holds nothing heavier than spice jars.
Plywood and screws add another $5 to $15 per shelf depending on what your local home center charges.
A standard 4 x 8-ft. sheet of hardwood plywood runs about $50, and Baltic birch pushes to $65 if you want cleaner edges and no voids in the core.
Baltic birch plywood never has voids in the inner core, and you’ll spot it by the thinner laminations in the core compared with standard hardwood plywood.
That cleaner edge matters if your shelf face stays visible, but standard plywood saves $15 per sheet and performs the same. One shelf takes 1 to 2 hours start to finish.

Drawer Size & Total Width: The pull out cabinet drawer body measures 22" W × 21" D × 3.2" H,Including 2 slide rails,The total installed width is 23".

FLEXIBLE BOTTOM OR SIDE MOUNT INSTALLATION: Designed for both bottom-mount and side-mount installation to fit different cabinet layouts and storage needs. Drawer size measures 16" W × 21" D × 6.2" H, with total installed width of 17".

Strong & Durable: Probrico drawer slides and brackets are made of cold rolled steel with zinc plated finish. Heavy duty slides load up to 100 LB. Tested for 100,000 times smooth opening and closing, rust resistant and long lasting for daily use
Tools You Actually Need

A circular saw is the only power saw you need for this project. It handles the shelf bottom, front, back, and sides in one pass each if you clamp a straightedge to guide it.
Skip the table saw and router for basic builds; you will not need them. A drill drives the screws and bores any clearance holes your slides require.
Add a tape measure you trust, because every dimension in a cabinet build stacks. If the box is an eighth inch too wide, the slides bind or the shelf scrapes the frame.
A pocket-hole jig changes how fast the box goes together. Sources that use one set pocket holes along the bottom edges of the front, back, and sides, glue the joints, and clamp for thirty minutes.
I would reach for mine if I owned it, but I would not buy one just for shelves.
One and a quarter inch wood screws with glue work the same way. They are less precise and a touch slower to align, yet the assembled box holds just fine.
A level and a pair of clamps earn their keep at installation.
The level keeps the drawer slides square to the cabinet face so the shelf does not list or jam. Clamps free both hands to mark and drive.
That is the full kit. Nothing else belongs on the shopping list for a first build.

Full Extension Drawer Runner: The 3-fold full extension ground mount drawer tracks enables the slides to pull out the full length of the drawer or sliding tray, providing full access to the contents, offering more storage space and room in your slide tray
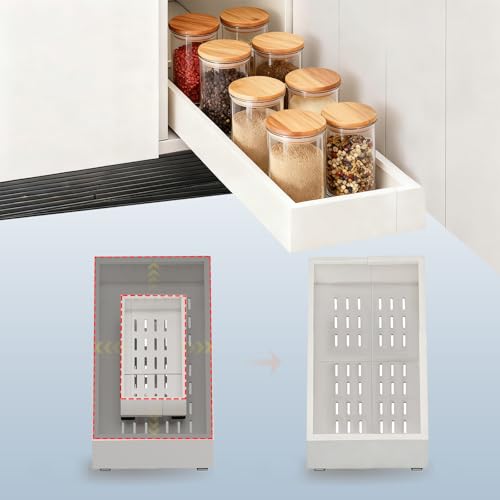
IMPORTANT NOTICE:Our cabinet pull out shelves are not suitable for cabinets with lips.Before ordering,please measure your cabinet dimensions correctly using the method shown in the picture.If your cabinet has a lip,please choose from our other drawers options designed for cabinets with a lip available in the store

Versatile multi-purpose storage items with a coordinated look
Installation Tips That Save Rework
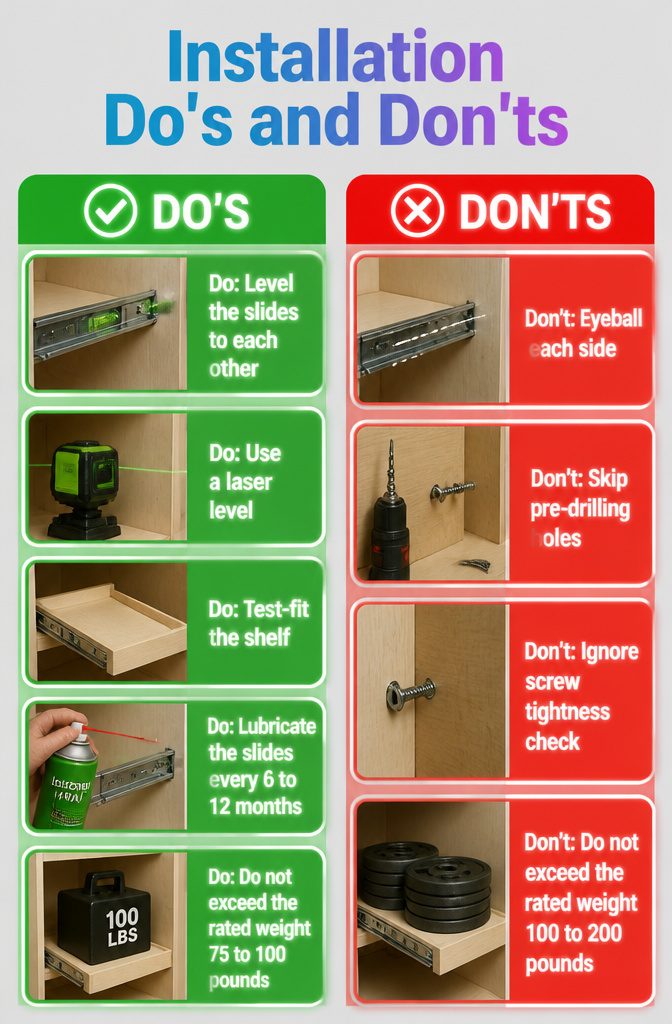
The small details in installation decide whether your pull-out shelf glides smoothly or jams after a month.
Slides must be level to each other, not just to the cabinet floor. A laser level helps here; eyeballing each side separately is how you end up with a shelf that binds halfway out.
Pre-drill every screw hole, especially in plywood sides. A split cabinet wall ruins the whole afternoon.
A few habits that save rework:
- Test-fit the shelf before driving the final screws. Slide it in, pull it out, listen for scrape points. Shim with masking tape behind a slide if the box sits a hair narrow; fixing a too-wide box means rebuilding it.
- Check screw tightness once a year. Seasonal humidity loosens fasteners in cabinet-grade plywood more than you’d expect.
- Lubricate the slides with silicone spray if they start to grab, usually every 6 to 12 months. Ball-bearing slides need this more than roller slides, but both benefit. Do not exceed the rated weight; most common slides handle 75 to 100 pounds, and heavy-duty pairs top out around 100 to 200 pounds depending on what you paid.

【Product Specifications】Length 22inch(550mm), width 1.77inch(45mm),thickness 1/2inch(12.7mm),applicable drawer depth 550-600mm. 12inch, 14inch, 16inch, 18inch, 20inch, 22inch, 24inch drawer slides are available. Please check the size carefully and choose the right rail for your drawers

[4 pairs Full Extension Drawer Slides]:You will get 4 pairs(8pcs) full extension drawer slides ,22 inch.And each pair matchs with 12pcs screws.Sulawskys full extension drawer slides designed with 3-fold full extension, enabling them to fully open for easy access. You won't need to reach under the lip of your cabinet to access anything in the drawer.Ball bearings ensure smooth and quiet performance that offer less noise at clsing and opening creating a silent life environment for your family

[4 pairs Soft Close Drawer Slides]:You will get 4 pairs(8pcs) soft self close drawer slides ,22 inch.And each drawer slides match with 12pcs screws.Sulawskys self close drawer slides designed with ultra smooth soft-close function. Continuous bearings ensure smooth and quiet performance that offer less noise at closing and opening creating a silent life environment for your family.
Frequently Asked Questions
How much does it cost to build DIY pull-out shelves?
DIY pull-out shelves run about $10 to $50 per shelf.
Drawer slides are the biggest variable, with cheap pairs at $7 and quality ball-bearing pairs at $16. Plywood and screws add another $5 to $15, and reusing an existing shelf instead of building new cuts both cost and time.
What type of drawer slides are best for pull-out shelves?
Ball-bearing full-extension slides are the best choice for nearly every kitchen or pantry build.
They carry 75 to 100-plus pounds, extend the full depth of the shelf, and hold up through years of daily use. Skip roller slides entirely; their three-quarter extension and plastic wheels bind under real load.
How do you measure for pull-out shelf installation?
Measure the interior width, depth, and height of the cabinet, then subtract the slide thickness from the width.
Most slides are ½ inch thick per side, so a 21-inch interior becomes a 20-inch shelf. Check width at the back, middle, and front, since cabinets are rarely square, and account for any face-frame overhang in your depth measurement.
Can you add pull-out shelves to any cabinet?
Yes, both face-frame and frameless cabinets can take pull-out shelves.
Face-frame cabinets need spacer blocks behind the frame so the slides mount flush; frameless European-style cabinets let you attach slides directly to the side walls. Either way, keeping the slides level to each other matters more than the cabinet style.