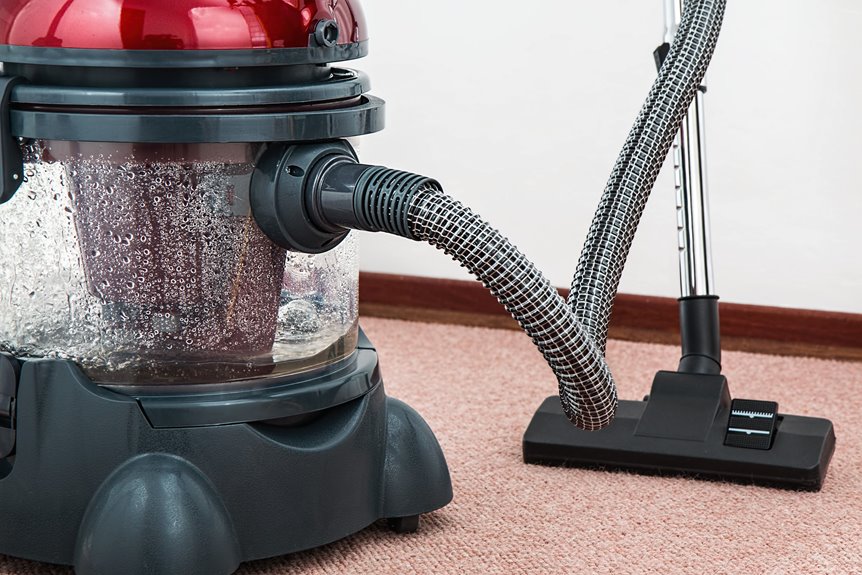
I’ve tackled this midnight disaster more times than I care to admit, and speed beats perfection here. First, I grab rubber gloves, a blunt scraper, paper towels, baking soda, vinegar, dish soap, and a spray bottle; my vomit-fighting arsenal. I scrape solids from outside toward center without smushing, then blot, blot, blot with clean towels. I mix equal parts vinegar and water or grab an enzyme cleaner, apply from edges inward, rinse with a damp sponge, and dry thoroughly with fans blazing. Baking soda sits overnight, vacuumed tomorrow. Wool or silk. I call the pros immediately; I learned that expensive lesson once. This methodical approach protects your carpet and reduces stress during cleanup.
Gather Supplies Before You Start

Why jump straight into the mess when a little prep work saves your sanity and your carpet fibers? Scrambling mid-cleanup is a nightmare, so let’s gather supplies together and feel prepared.
First, grab rubber gloves because nobody wants that on their hands. For vomit cleanup, you need a blunt scraper, paper towels, clean rags, baking soda, vinegar, dish soap, a spray bottle, and a vacuum. Don’t forget a damp sponge for blotting. This is your best tool in these cleaning steps.
Open windows for ventilation. Have two disposal options ready: a trash bag for soiled towels plus a separate container for the soiled scraper. Test cleaners on a hidden corner first, because warranties matter and protecting your surfaces is essential.
Stop Here: Call a Pro for Wool or Silk Carpets

You want to be the hero of your own carpet saga, right? But when we’re talking wool or silk, put down that spray bottle.
These gorgeous natural fibers are demanding. They require respect, not your bargain stain remover. Here’s why professional cleaning is necessary:
- Wool and silk react poorly to moisture, shrinking or bleeding color everywhere
- Professional cleaners own specialized, fiber-safe gear you can’t grab at the store
- DIY carpet cleaning on these materials risks permanent, irreversible damage
- Dried vomit requires immediate expert stain removal, not manual scrubbing
I’ve seen too many beautiful rugs destroyed by overconfidence. Call the pros, save your treasure, and know when to delegate.
Remove Solid Vomit Without Pushing It Deeper
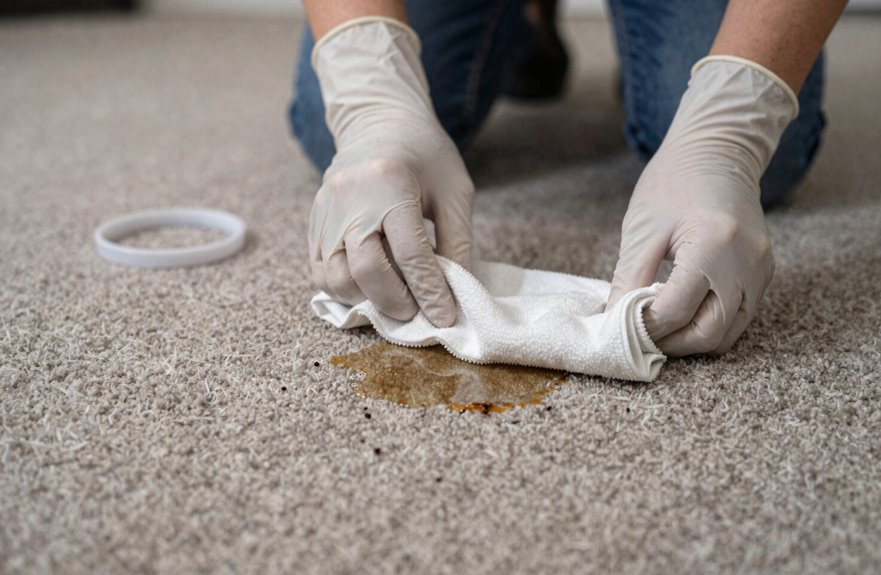
For synthetic or sturdy carpets, get hands-on with solid vomit removal. Start with protection: rubber gloves to keep debris off your hands. Grab a spoon or spatula and begin lifting from the outside of the carpet stain toward the center. Working inward prevents the mess from spreading further.
Avoid rubbing, as this pushes everything deeper into the fibers where it becomes difficult to remove. Instead, blot with paper towels, pressing gently to soak up moisture. If something’s stubborn, dampen with water just enough to loosen it, then keep lifting in small sections. This controlled, patient approach works effectively.
Handle Dried Vomit: Dampen First, Then Scrape
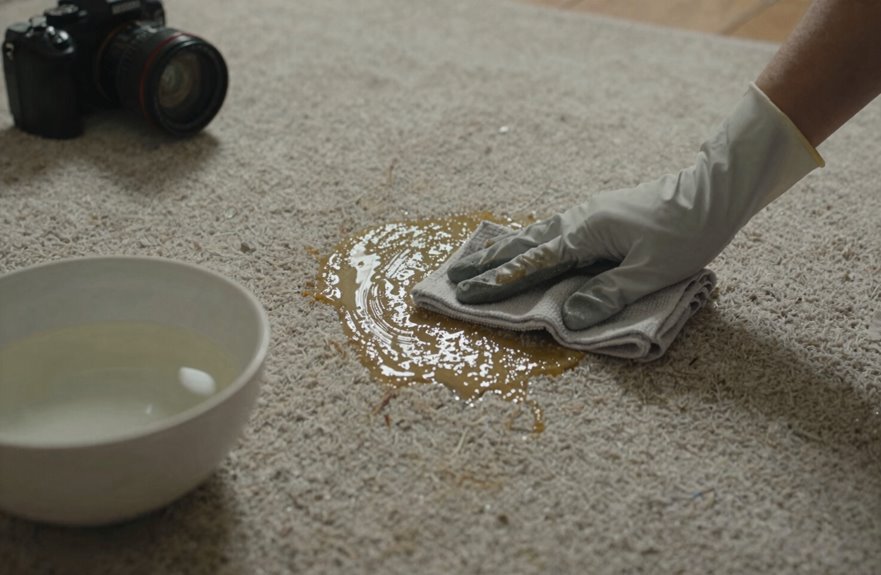
The worst-case scenario has happened. I’m staring at yesterday’s disaster that’s now crusted into my carpet like some kind of abstract art installation I definitely didn’t commission.
Here’s how we tackle this dried vomit nightmare together:
- I dampen the spot with warm water, letting it sit like a mini spa treatment for grossness
- I grab a blunt spatula, nothing sharp; we’re not surgeons, and I scrape from outside toward center, containing the chaos
- I blot with paper towels, pressing firmly, no rubbing (we’re not making abstract art worse)
- I repeat in small sections, adding cleaning solution for stubborn bits, until my carpet breathes again
Wear gloves. Bacteria’s not invited to this party. This method removes dried vomit effectively.
Blot Vomit Stains: Don’t Rub Them Deeper

I learned the hard way that rubbing a vomit stain shoves everything deeper into your carpet fibers, like trying to push a grape into a shag rug. That’s why blotting is the better approach. It’s gentler, smarter, and more effective when you see the paper towel actually lifting the mess instead of spreading it like abstract art. Grab a clean cloth and maybe a spoon for the chunky bits. I’ll show you exactly how to blot from the outside in, swap towels like rotating sushi plates, and get that carpet looking less like a crime scene.
Why Blotting Matters
Why does one tiny panic-rub turn a manageable mess into a fiber-deep disaster? I’ve been there, frantically grinding that stain deeper while my carpet suffers damage.
Blotting is effective because it’s your carpet’s best defense against permanent staining.
Here’s what works for smart stain removal:
- Blotting lifts moisture without pushing particles deeper, unlike rubbing which grinds everything into the fibers
- Press with an absorbent cloth from outside to center, trapping the mess instead of spreading it
- Fresh material, repeated pressing, then a damp rinse prevents the stain from transferring back to the surface
- Vigorous scrubbing frays fibers and embeds stains; gentle pressure preserves texture
For stubborn vomit odor, sprinkle baking soda after blotting, let it absorb, then vacuum. Your carpet cleaning routine should start with blotting, not aggressive scrubbing.
Tools For Blotting
Now that I’ve convinced you blotting beats scrubbing every single time, let’s talk gear, because I’ve definitely grabbed the wrong thing in a hurry and made things worse.
For this job, I reach for paper towels first, the plain white kind, nothing fancy. They’re disposable, absorbent, and I’m not ruining my good linens on this mess. If I’m feeling fancy or out of towels, I’ll grab a clean cloth, something white cotton I don’t mind sacrificing.
Fresh towels matter constantly. Swap them out the second they get saturated, because a soggy blot cloth just pushes gunk around. The blotting motion matters too; light pressing without excessive pressure lifts carpet fibers without crushing them. Gentle, repeated pressure produces better results than aggressive scrubbing.
Blotting Technique Tips
How exactly do you blot without turning a manageable mess into a fiber-deep disaster.
Here’s what actually works when you’re facing that dreaded vomit stain:
- Start blotting from the outside edges toward the center, because spreading the stain creates a bigger problem for both cleanup and carpet restoration.
- Grab clean paper towels, swap them constantly, and let them absorb that moisture thoroughly.
- When you apply cleaning solution, blot gently. Don’t scrub, as that damages carpet fibers.
- Keep blotting until the spot feels noticeably less moist, then let it air dry completely before vacuuming to restore the carpet pile.
This method prevents permanent staining and fiber damage.
Apply Baking Soda to Absorb Moisture and Odor
Sprinkle baking soda over the wet spot, covering every inch until it looks like a winter wonderland. The powder will start clumping up in about fifteen minutes, turning into small dough balls that indicate it’s working. Baking soda absorbs moisture and eliminates odors before they spread throughout your home. If you still detect a smell after vacuuming, apply baking soda again. Repeat applications are necessary to fully remove lingering odors.
Moisture Absorption Technique
Baking soda is an effective tool for vomit stain removal. Keep a large box under your sink for this purpose. Moisture absorption is critical to successful carpet cleaning.
Here’s the process:
- Sprinkle a generous layer of baking soda, completely blanketing the damp spot
- Wait 10 to 30 minutes, watching it clump as moisture absorption occurs
- Vacuum with a brush attachment, sucking up every crusty bit
- Repeat if needed for stubborn stains
The clumping indicates odor neutralization is working. Vacuuming thoroughly prevents gritty residue from remaining in the carpet fibers. Rushing this step leaves behind soda particles. Allow the carpet to dry completely before walking on it to avoid tracking powder across the floor.
Odor Neutralization Method
Nothing kills the vibe of a freshly cleaned carpet like that lingering sour smell. I grab my trusty baking soda, that cheap miracle worker, and blanket the spot like I’m frosting a very unappetizing cake. We’re talking generous amounts; pile it on. This is odor neutralization warfare. I let it sit there, working its magic, while I doomscroll for ten to thirty minutes, sometimes longer. Then comes vacuuming with that brush attachment, the satisfying crunch giving way to freshness. Sometimes stain removal needs a second round after drying, because thorough work prevents incomplete results. Complete drying is non-negotiable. Mold won’t develop in properly dried carpet.
Mix Your Cleaning Solution (Or Choose Store-Bought)
A good cleaning solution is your covert advantage against that stubborn stain staring back at you. I learned this after one memorable incident involving my niece, a carnival, and my living room rug. For carpet cleaning after vomit, you’ve got two paths, and both work beautifully.
Here’s what I’ve tried:
- DIY solution: Mix baking soda, white vinegar, dish soap. It’s cheap, effective, and you probably own it already.
- Vinegar-water: Equal parts breaks down that grossness without scary chemicals.
- Enzyme cleaner: Store-bought miracle worker for deep odors and worth the investment.
- Pre-treatment test: Always spot-check hidden carpet first to avoid damage.
Whether you’re team homemade or grab-and-go, you’re already winning by tackling this head-on.
Clean the Stain From Outside to Center
I learned this the hard way after turning a small spot into a carpet catastrophe. Always start at the outer edge and work inward, like you’re drawing a spiral, not splattering paint. Think of it as building a fence; you’re containing the mess, not giving it room to run wild across your living room. That controlled motion prevents your stain from doubling in size while you’re still fumbling for paper towels.
Preventing Stain Spread
Why does every stain seem to have a secret ambition to become the size of a dinner plate. I’ve watched it happen, and I’m not letting it happen to you.
Here’s how we keep that mess contained, together:
- I grab a blunt tool for gentle lifting of solid chunks. No smushing, no panic.
- I blot from outside to center, because I’m trapping that stain, not chasing it across your carpet like it’s playing tag.
- I’m blotting, never scrubbing. I avoid rubbing like it’s my ex at a party; I dab with purpose, with rhythm, with hope.
- I’m wearing gloves, clearly, because I’m enthusiastic but not reckless.
If it’s dry, I lightly dampen with warm water first. We’re smart, and we’re stain-fighting warriors.
Containment Technique Importance
The trick to winning this battle is in where you start, not just what you throw at it. I’ve learned the hard way that containment is everything when you’re staring down a carpet disaster.
I always begin scraping from the outer edges, working slowly toward the center like I’m drawing a tight circle around the chaos. This boundary method keeps the mess from spreading across your fibers. After I’ve lifted the chunks with a spatula, without rubbing, I switch to blotting with fresh paper towels, still moving from outside in. This containment technique protects your carpet fibers and prevents the stain from setting deeper into the carpet.
Controlled Cleaning Motion
Once you’ve got that mess corralled, the real magic happens. I’ve learned this the hard way after turning a two-inch spot into a dinner-plate disaster.
You’ve got to blot from the outside, spiral inward. Think of it like coloring inside the lines, except the prize is your carpet’s life. I throw on rubber gloves first. Nobody wants that under their nails. Then scrape solids with a spoon, always blunt side.
Here’s my battle-tested cleanup rhythm:
- Blot liquids with paper towels, never rub the fibers raw
- Dampen a cloth, work outer edge to center, no oversaturating
- Repeat the spiral blotting motion until the stain surrenders
- Sprinkle baking soda for odor neutralization, vacuum tomorrow
This motion prevents the stain from setting and spreading further into carpet fibers. Following this sequence will produce the best results.
Rinse and Blot the Carpet Completely Dry
A fresh, dry cloth is essential here. Grab yours and blot the carpet thoroughly, lifting every last trace of vomit moisture before it settles permanently.
Next, rinse the spot with a damp sponge. Never use one that’s soaking-wet, as that creates excess moisture. Use it to whisk away cleaner residue that would attract dirt later. Then blot again with fresh towels, pressing until your carpet feels dry to the touch and zero moisture transfers to the cloth.
Crank a fan and throw open windows to maximize airflow. Complete drying prevents mold and odor development.
Deodorize Again to Eliminate Lingering Smells
Why stop at clean when you can have actually fresh. That vomit smell loves to hide in carpet fibers, mocking us, but I’ve got your back.
Here’s my battle-tested freshness arsenal:
- Sprinkle baking soda generously, wait 10–15 minutes, vacuum. It devours odor like magic.
- Stubborn stink. Hit it again, or grab an enzyme-based odor remover. Those biological warriors break down the gross stuff.
- Still catching whiffs. Blot with diluted vinegar. That sharp scent fades fast.
- Run a fan, crack windows. Dry carpet means no trapped odor in the padding.
I vacuum daily for three days after, because carpet padding retains moisture that traps odor. No shame in wanting your space to smell like home again, not a disaster zone.