

A finished drawer box takes about one Saturday, a quarter sheet of plywood, and the patience to measure diagonals before the glue dries.
Most first builds fail because the box racks a fraction of an inch out of square, then binds for years.
That changes if you clamp across the longer diagonal and wait for the glue to cure before attaching the bottom.
The article pairs a 15-by-20-inch box with 18-inch Everbilt full-extension slides, leaving two inches of clearance so the front does not eat into usable depth.
1. Measure and Plan the Opening
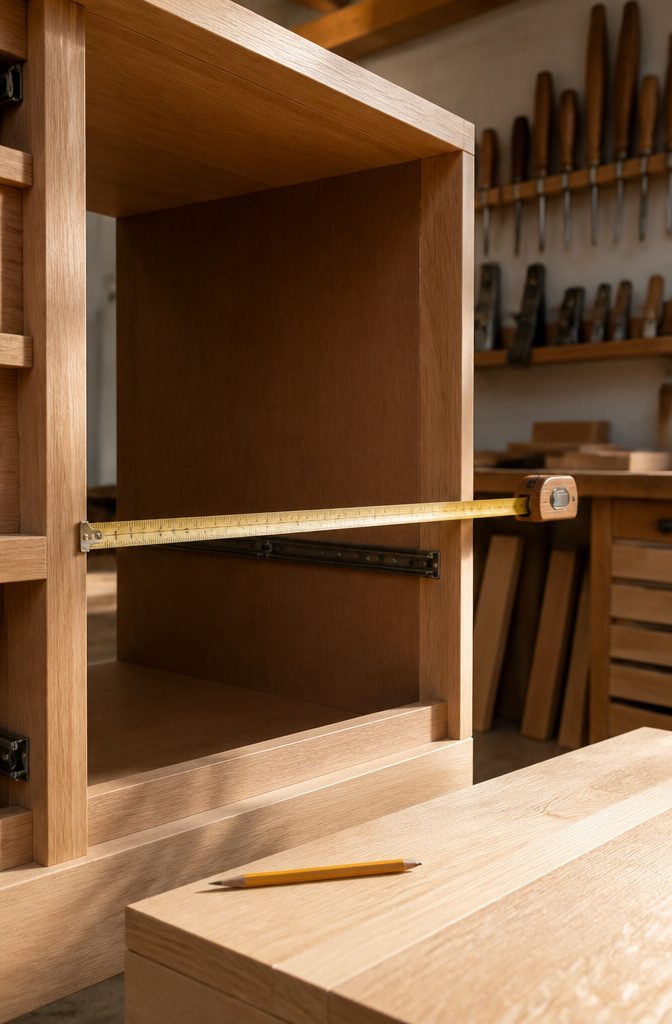
The drawer box width starts with the cabinet opening measured left to right. From that opening, subtract the combined thickness of both drawer slides before you touch the saw.
Standard side-mount slides usually run about 1/2 inch thick each, so a pair eats up a full inch of that opening. The front and back pieces then get sized from whatever remains after the slides are accounted for.
Inset drawers sit flush inside the cabinet frame, while overlay drawers rest on top of it. That choice changes your math entirely, since an overlay front needs extra width to cover the frame edges.
A practical starting point for most kitchen or bath projects is a box measuring 15 inches wide, 20 inches long, and 5 1/2 inches high, with the cabinet itself running at least 21 inches deep to give the slides room to fully extend.
Solid wood sides in 1×4 or 1×6 stock measure a true 3/4 inch thick, though 3/4 inch plywood often runs slightly thinner.
That quarter-inch difference matters when you are fitting a drawer into a tight opening. I would measure the actual stock with calipers before cutting rather than trusting the label on the rack.

Pocket-Hole Jig with Clamp: Includes Classic 2 Inch Face Clamp for secure positioning during pocket-hole drilling

FULLY CUSTOM DRAWER BOX SIZE: Built to your exact width, depth and height in 1/32 in increments for side mount or undermount slides, frameless or face frame. Send your cabinet opening measurements and we cut the box to fit.

Easy Woodworking Tools: Kreg pocket-hole joinery is the fast, strong, easy way to join wood-drill, drive, and done
2. Cut the Box Parts

Three-quarter-inch solid wood gives drawer sides the heft they need to stay square under load, while plywood can go a hair thinner since its layers resist warping on their own.
For the bottom, 1/4 inch plywood handles most household storage, but step up to 1/2 inch if the drawer will hold tools, cast iron, or anything else that adds real weight.
For a typical project measuring 4 inches tall, 21 inches deep, and 16 inches wide, the math works like this. The two long sides run the full 21-inch depth.
The front and back pieces need to fit between them, so subtract the thickness of your side material from the 16-inch width. With 3/4-inch sides, that puts the front and back at 14-1/2 inches each.
The bottom panel itself gets sized to the interior opening plus about 1/8 inch if you are cutting a dado groove for it to rest in, or simply cut to the full interior dimension if you plan to nail it flush from below.
That bottom-fix choice matters before you touch the saw, since it changes every cut.

Slides are 45 cm long but can be cut to length if needed, undrilled

Durable Hardwood Material: experience the long lasting durability of our "T" shaped center mount drawer slides made from hardwood; Designed to provide a smooth glide for dressers and cabinets, they are a nice replacement solution

Perfect for Restoring Old Drawers:Designed for replacing worn or broken wooden drawer slides, ideal for old drawers, dressers, and vintage furniture repair projects.
3. Drill Pocket Holes

A Kreg jig lets you hide every screw from the outside of the drawer, which is the difference between a box that looks finished and one that looks shop-class.
Use 1 1/4 inch wood screws once the holes are drilled. The cleaner front matters most on face-frame cabinets or anywhere the drawer side stays visible when it is open.
Lay out the front and back pieces with the groove facing down, then drill pocket holes into both ends on the opposite face.
Stay clear of that groove, a drill bit breaking through into it weakens the joint and can split the thin wall that remains.
The jig sets the angle and depth automatically, so the main thing to watch is placement, not technique.
This step is optional. If you are painting the box or the sides will never show, driving screws straight through the sides into the front and back is faster and holds just as well.
For a stained drawer or open shelving where the sides stay exposed, the extra ten minutes with the jig is worth it.

[4 pairs Full Extension Drawer Slides]:You will get 4 pairs(8pcs) full extension drawer slides ,18 inch.And each pair matchs with 12pcs screws.Sulawskys full extension drawer slides designed with 3-fold full extension, enabling them to fully open for easy access. You won't need to reach under the lip of your cabinet to access anything in the drawer.Ball bearings ensure smooth and quiet performance that offer less noise at clsing and opening creating a silent life environment for your family

[6 pairs Soft Close Drawer Slides]:You will get 6 pairs(12pcs) soft self close drawer slides ,18 inch.And each drawer slides match with 12pcs screws.JI2OOYI self close drawer slides designed with ultra smooth soft-close function. Continuous bearings ensure smooth and quiet performance that offer less noise at closing and opening.

【High quality, more durable】 The drawer slides is made of 1.2mm thickness high quality cold rolled steel and industrial solid steel ball,which take 100,000 times push-pull tests without damage. The maximum load weight is up to 100lbs. REGUDA is committed to produce sturdy and durable drawer slides .Besides the quality,we also focused on after-sales service,any quality or installing problem please feel free to contact us.
4. Assemble the Box Square
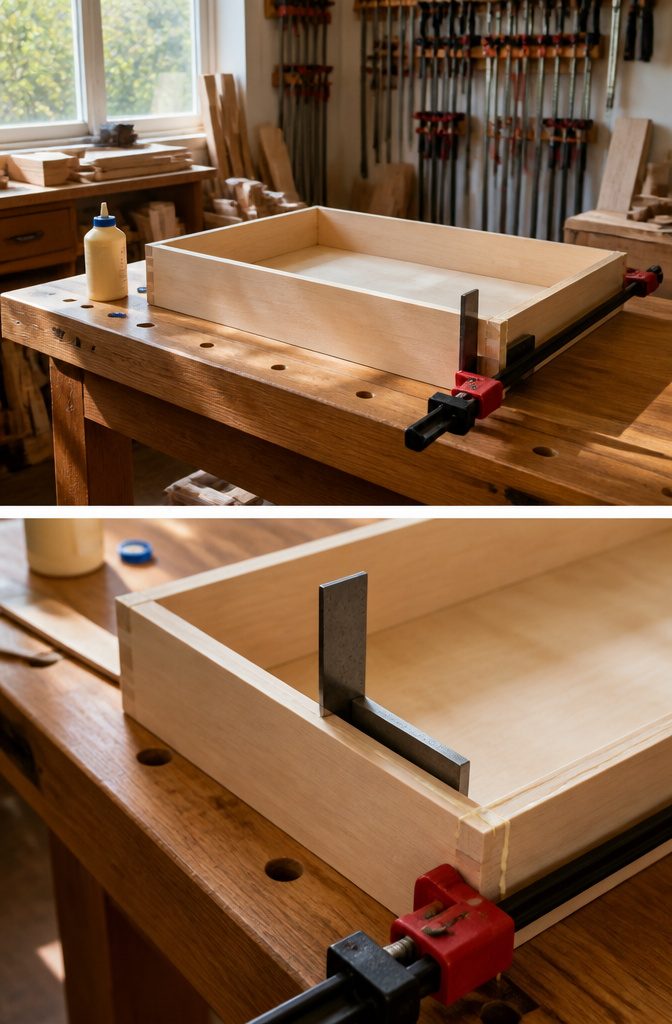
Wood glue goes on every joint where the sides meet the front and back. I use Titebond II or whatever yellow glue is closest on the shelf; the brand matters less than getting full coverage across the mating surface.
A carpenter’s square pressed into the corner keeps the angle honest while you drive 1¼" wood screws through the side panels into the front and back rails.
Set the screw heads flush or slightly below the surface so they never scrape against the cabinet sides later.
A drawer that is not square will bind every time it slides, and this is where most first builds fail.
The clamp-and-glue stage is not the place to rush. Check the diagonals corner to corner with a tape measure.
Match those two numbers exactly, even if it means loosening a clamp and starting over. If one diagonal reads longer, squeeze that longer diagonal with a bar clamp until the numbers even out and the square confirms 90 degrees.
Let the glue cure fully before you move on to attaching the bottom panel; a shifted joint now means a drawer that jams for years.

Perfect Size for Drawer Bottom Replacement: Each plywood sheet measures 16.54 x 11.8 x 0.12 inches, fitting most standard drawer bottoms for quick and easy repair.

Specific Material: our wood drawer slides are mainly made of wood with metal slide glides, which are wear resistant and corrosion resistant, not easy to loose, and they are also stable and firm

【Superior Material】:The cross flat head wood screw set is made of high quality carbon steel, the screws are professionally treated with black oxide coating for good rust resistance and corrosion resistance in harsh environments, they are strong and will not deform or break under normal use, durable.
5. Attach the Bottom
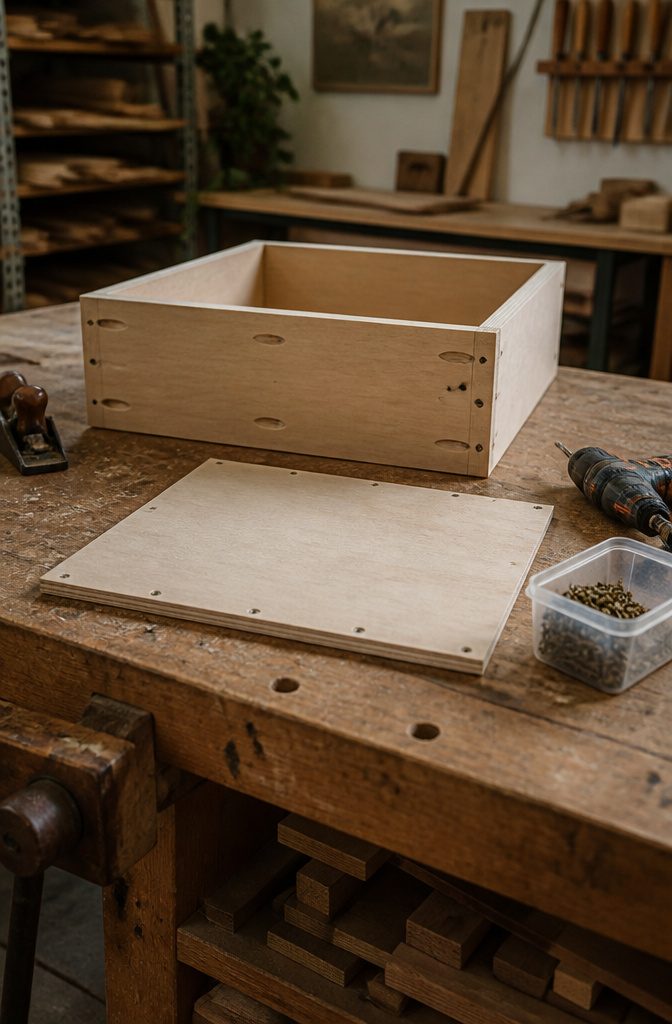
Attach the bottom panel after the box is square and clamped, not before.
Screws from the underside let you remove and replace the panel later if it warps or splits, which happens more often than plans admit, especially in a kitchen drawer that sees moisture and weight.
Glue turns the bottom into a permanent part of the structure; skip it here.
I use 1/4-inch plywood for most bottoms and drive screws every 6 inches or so along the front and back rails.
The sides carry less load, so a screw near each corner there is enough. Keep the heads flush or slightly recessed so they do not catch on anything sliding underneath.
If you are building for a rental or a first home you might sell in five years, a replaceable bottom is the detail that saves you from rebuilding the whole box when one part fails.
The ten minutes it takes to screw instead of glue pays back the first time a panel sags.
6. Install the Slides

Side-mounted ball bearing slides still dominate most weekend builds, and for a 20 inch deep drawer the common pick is an 18 inch full-extension slide by Everbilt.
I would go with that exact pairing myself: the two-inch difference leaves room for the drawer front without eating into usable depth, and full extension means you reach the back corner without crawling inside the cabinet.
Alignment matters more than brand here.
A slide even 1/16 inch off will grind or stick, and owners on Reddit mention chasing binding issues for hours before realizing their clearance was tight on one side. The same tolerance applies vertically.
I set the slide end flush to a line marked one inch back from the drawer opening face, matching my drawer front thickness, then use a scrap 1×2 as a spacer to hold height while I drive the first screw.
Undermount slides are an option if you want the hardware hidden, but they demand exact drawer width from the start and stricter tolerances. For a first build, side mount forgives more and costs less.

Set up in seconds with the magnetic quick-adjust base, so this pocket screw jig moves from board to board fast. As a drill jig for angled holes it positions each cut at the correct entry point without extra measuring or fussing with clamps.

RIGID ALL-METAL MAIN BODY FOR GREATER STABILITY: Built for woodworkers who demand stronger, more accurate pocket-hole joinery. The rigid all-metal main body combines CNC-machined components with an integrated quick-release toggle clamp to create a stable drilling platform with less flex than lightweight plastic jigs. Designed to keep every workpiece securely aligned, this professional-grade pocket hole jig helps produce cleaner pocket holes and stronger joints for everything from quick DIY repairs to fine furniture building

Versatile 5-pack – Includes five cloud-shaped mini cutters for home, office, craft, and shipping use.
7. Fit the Drawer Front

The drawer front is the face everyone sees, and small gaps read as mistakes. Before the final screws go in, shim and adjust until the gap is even all around.
Inset drawers sit flush inside the cabinet frame, so the front must line up perfectly with the surrounding rails and stiles.
Overlay fronts overlap the frame by a small margin, usually 1/2 inch or so, which forgives minor imperfections in the box behind it.
Either way, I mount the front with the drawer closed, working from inside the box through the back of the face. A few temporary screws let me open and close the drawer to check the reveal before I commit.
Pine trim on the front adds detail but also thickness; account for that when you set your shims.
The 1/2 inch plywood called out for drawer fronts takes paint well and stays stable, though solid wood edge banding on the sides keeps the profile cleaner if the front edge ever shows.
I check corners with a square and step back to sight the whole run of drawers. One front out of line throws off the kitchen more than a slightly sloppy joint inside the box ever could.

[drawer slide set] You will receive 1 set of solid wood slide rails. include 1 male and 1 female, 15.7 Inchs(40CM)(there is some error in measurement)

RUGGED AND DURABLE - SG TZH Wood screws made of high-quality Carbon Steel,which has higher corrosion resistance and anti-rust effect than ordinary screws, longer service life, not easy to damage, more solid.

Package Included: This package includes 6 pieces of wood drawer slides, crafted from durable beech wood. Measuring 44 cm (17.2 inch) in length, 4.7 cm (1.86 inch) in width, and 1.5 cm (0.6 inch) in height, these classic wooden drawer glides provide a sturdy and reliable solution for your drawer needs
What You Need Before Starting

You need 1/2 inch and 3/4 inch plywood, wood glue, screws, and drawer slides. The 1/2 inch works for standard drawer sides; the 3/4 inch is what I reach for when I want pocket-hole joinery with more meat for the screw to grab.
A quarter sheet of either is plenty for a pair of small drawers, so you are not hauling full panels home.
For tools, a drill is non-negotiable, and a Kreg jig turns the corner-joint problem into something you can do on a kitchen table.
Clamps matter more than people think; without them, the box drifts while the glue sets. A circular saw rips plywood straight if you use a guide, though a table saw saves time if you have access to one.
Drawer slides are where I would spend the money first.
Full-extension soft-close undermount slides feel like furniture, not plywood shop projects. Side-mounted slides cost less and install faster, but you lose the clean look and a bit of interior width.
Either way, buy them before you cut a single board. Slide length dictates your box depth, and nothing kills a Saturday like a second trip to the hardware store for the one part that ties the whole thing together.

[4 pairs Full Extension Drawer Slides]:You will get 4 pairs(8pcs) drawer slides ,18 inch.And each drawer slides match with 12pcs screws.Continuous bearings ensure smooth and quiet performance that offer less noise at closing and opening.

[4 pairs Full Extension Drawer Slides]:You will get 4 pairs(8pcs) full extension drawer slides ,18 inch.And each pair matchs with 12pcs screws.Sulawskys full extension drawer slides designed with 3-fold full extension, enabling them to fully open for easy access. You won't need to reach under the lip of your cabinet to access anything in the drawer.Ball bearings ensure smooth and quiet performance that offer less noise at closing and opening creating a silent life environment for your family.

[4 pairs Soft Close Drawer Slides]:You will get 4 pairs(8pcs) soft self close drawer slides ,18 inch.And each drawer slides match with 12pcs screws.Sulawskys self close drawer slides designed with ultra smooth soft-close function. Continuous bearings ensure smooth and quiet performance that offer less noise at closing and opening creating a silent life environment for your family.
Inset or Overlay

The inset versus overlay choice is the first fork in the road because it changes every measurement that follows.
Inset drawers sit flush with the cabinet frame, which means the drawer front must be cut slightly smaller than the opening and the box must be sized to leave even reveal on all four sides.
Overlay drawers sit on top of the frame, so the front covers the edges entirely and the box itself can be a little shorter; the math is more forgiving if your opening is not perfectly square.
I reach for inset on built-ins where I want the face-frame look to read as furniture.
Overlay is what I use for shop projects and utility storage because I can build the box to fit the opening, then cut a front that laps over by a half inch or so and covers any small gaps.
The slide clearance differs too: inset usually needs side-mounted slides with a specific offset, while overlay pairs easily with undermount hardware since the front hides the brackets.
| Attribute | Inset | Overlay |
|---|---|---|
| Front size vs. opening | Smaller, by reveal on all sides | Larger, overlaps frame |
| Box length | Must clear frame inside opening | Sits inside opening, front covers frame |
| Slide type | Often side-mounted | Often undermount |
| Forgiving if opening is out of square | Less forgiving | More forgiving |
| Typical use | Built-ins, furniture-look cabinets | Shop projects, utility storage |
Most built-ins I do are inset; most shop projects are overlay because the math is forgiving.

Perfect for Restoring Old Drawers:Designed for replacing worn or broken wooden drawer slides, ideal for old drawers, dressers, and vintage furniture repair projects.

Specific Material: our wood drawer slides are mainly made of wood with metal slide glides, which are wear resistant and corrosion resistant, not easy to loose, and they are also stable and firm
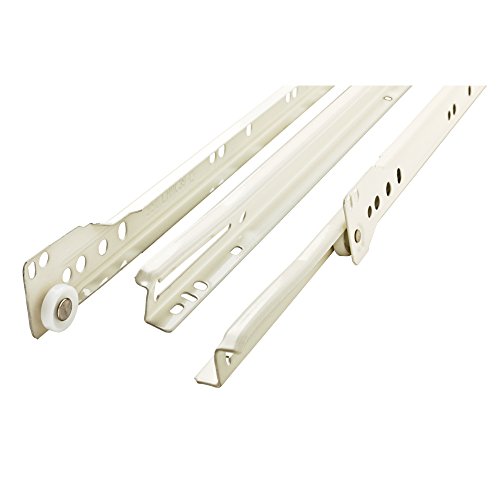
Made from stamped steel with a white epoxy finish
Side-Mounted or Undermount Slides

Side-mounted slides ride on the outside of the drawer box, so you see a sliver of metal when the drawer is open.
That visibility is the trade-off for a lower price and more forgiving installation; a 1/16-inch gap here or there will not bind the drawer.
Undermount slides disappear entirely beneath the box and almost always come with soft-close hardware built in, but they cost roughly twice as much and demand a drawer width cut to the exact spec of the slide model.
I put full-extension undermount soft-close in kitchens, where the hardware is invisible and the gentle close matters daily.
For shop drawers and closets, side-mount is my choice; the metal is out of sight once the drawer is shut, and the money saved buys better plywood for the box itself.
| Feature | Side-Mounted | Undermount |
|---|---|---|
| Visibility | Shows at drawer side | Completely hidden |
| Cost | Lower | Roughly double |
| Installation tolerance | More forgiving | Requires exact width |
| Soft-close | Rarely included | Almost always built in |
| Where I use it | Shop, closet | Kitchen |
Mistakes That Waste a Weekend

A drawer box that looks square on the outside can still rack enough to bind in its opening. Check diagonals before the glue sets: measure corner to corner across the box in both directions.
On a 20 inch box, even a 1/8 inch difference between those two measurements means the drawer will never slide right. Clamp across the longer diagonal and let the glue dry before you touch anything else.
Buying slides after cutting the box is the other weekend-killer.
I have seen it more than once: the builder assembles a perfect 20 inch deep drawer, then discovers the store only stocks 18 inch slides. Now the drawer front overhangs the slide by two inches, or the whole box gets rebuilt.
Pick your slides first, match the slide length to the drawer depth or go a touch shorter, and cut the box to fit what you actually have.
Frequently Asked Questions
What type of wood should I use for drawers?
Three-quarter-inch solid wood gives sides the heft to stay square under load, while plywood can go slightly thinner since its layers resist warping.
For bottoms, 1/4 inch plywood handles most household storage, but step up to 1/2 inch for tools or heavy items.
How do I measure for drawer slides?
Measure the cabinet opening from left to right, then subtract the combined thickness of both drawer slides. Standard side-mount slides run about 1/2 inch thick each, so a pair eats up a full inch.
The front and back pieces get sized from whatever remains after that subtraction. Always buy slides before cutting any board, since slide length dictates your box depth.
How do I make my drawers slide smoothly?
Alignment matters more than brand. A slide even 1/16 inch off will grind or stick, so mark a line one inch back from the drawer opening face and set the slide end flush to it.
Use a scrap 1×2 as a spacer to hold height while driving the first screw. Full-extension undermount soft-close slides feel smoothest, but side-mounted ball bearing slides still perform well when installed square.
How easy is it to build drawers?
A first build is straightforward if you follow the sequence: measure the opening, account for slide thickness, cut parts square, drill pocket holes if sides show, glue and clamp the box square checking diagonals, then attach the bottom with screws.
The most common failure point is skipping the diagonal check; even a 1/8 inch difference on a 20 inch box means the drawer will bind.
Can I make drawers from MDF?
It recommends plywood for its layered stability and solid wood for heft, with the note that plywood resists warping on its own.
MDF swells with moisture and lacks the screw-holding strength of plywood or solid wood, so it would not be the author’s choice for kitchen or bath drawers.