

A clean home that stays clean takes about twenty minutes of daily maintenance, not the four-hour marathons most people put off until Saturday.
The mistake beginners make is starting with a sponge instead of a trash bag: wiping around clutter burns energy and kills momentum before any real cleaning happens.
Pull everything off surfaces first, sort it into keep, donate, and discard piles, and clear the surplus immediately.
Bare surfaces are what make the rest feel doable, and a single $7 two-pack of microfiber cloths replaces the paper-towel pile that keeps sending you back to the closet.
1. Declutter First
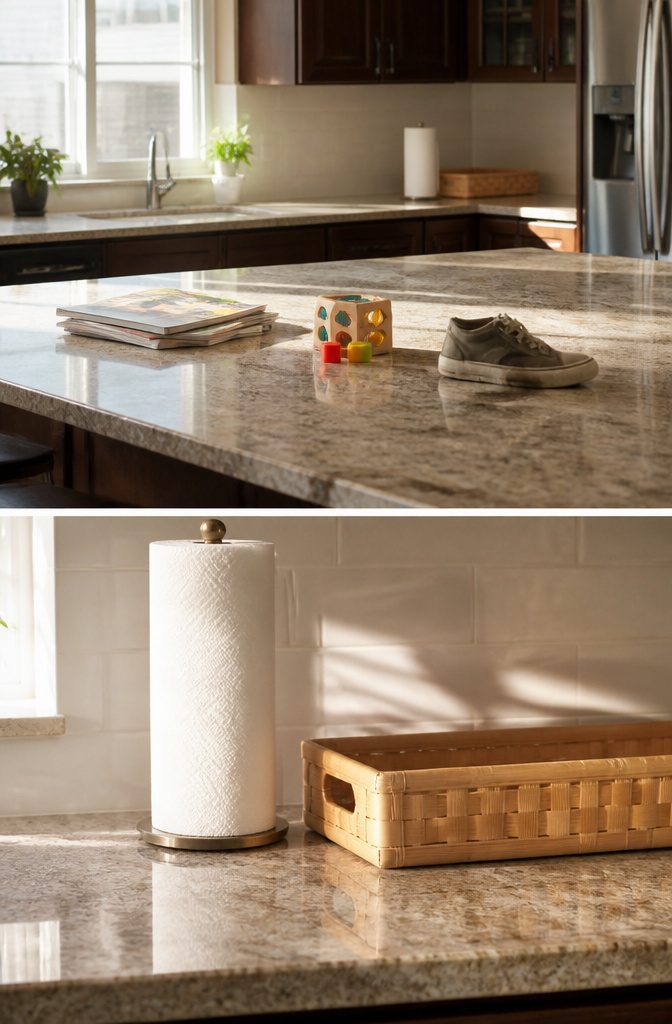
- Pull everything off surfaces first. Countertops, tables, and floors collect the stuff of daily living, and wiping around it is wasted motion. Pick up clothes, toys, mail, and anything that has a proper home elsewhere.
- Sort into three piles: keep, donate, and discard. Be objective about what actually gets used. Old magazines, outgrown kids’ items, and worn-out shoes usually land in donate or discard. The sources split on whether to add a separate recycling pile, so use one if it keeps you from hesitating.
- Clear the surplus immediately. Bag the trash, box the donations, and put the keepers where they belong. Seeing bare surfaces is what makes the rest of the cleaning feel doable, and that early progress keeps motivation from flatlining before you touch a sponge.


2. Gather Your Supplies

Microfiber cloths are the first thing I would grab, because wet they sanitize floors, counters, glass, and tile without dragging in extra products.
A two-pack runs about $7, machine-washes clean, and hangs dry. That single swap eliminates the paper-towel pile and the repeated trip to the closet that kills momentum.
The rest of the kit is straightforward: an all-purpose cleaner, a separate glass cleaner, a dusting tool, vacuum with crevice attachment, mop, and bucket. I keep mine in a portable caddy.
Having everything in one spot is what lets you clean for twenty minutes instead of spending ten just gathering. A basket works too, though I find caddies easier to carry room to room.
Gloves matter if you are using anything harsh, but for a basic weekend clean I would skip the face mask and the specialized surface bottles.
A general all-purpose cleaner handles most jobs; add a melamine eraser sponge for scuffs and a grout brush for tile lines only if your place actually has tile that needs it.

Premium Material & Prevent Scratches:The premium microfiber towels are made of 85% polyester, 15% Polyamide and use ultra-soft microfiber dual-weave edge design to help prevent any swirls or scratches on automotive surfaces.
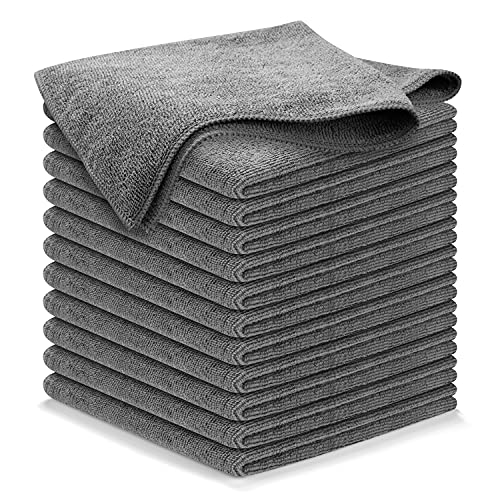
10x GRIP-ROOT WEAVE - TRAP MORE, WORK LESS: Ultra-absorbent microfiber towels for car Grip Root weave works like PLANT ROOT FOLLICLES, sucking up & LOCKING AWAY 8x to 10x its weight in liquid, particulates, moisture, grime and dirt in far LESS TIME than traditional ‘Heavy Duty’ Cleaning Rags. Each towel features a 2.5mm thick design, providing enhanced durability and better grip during use.

Double handy - set of 2 cloths.
3. Dust and Wipe Surfaces

- Start at the top and work down: ceiling fans and light fixtures collect the most settled dust, and gravity means anything knocked loose falls onto surfaces you have not yet cleaned. A dry microfiber cloth traps those particles instead of pushing them into the air.
- Hit shelves, countertops, and tables next. The cloth grabs what landed from above. For grime that resists a dry pass, switch to a dampened microfiber cloth: the fibers lift stuck-on residue without scratching.
- Finish with baseboards, where dust settles last. A dry dryer sheet works here to repel pet hair and dust for a couple of weeks.
"Bedrooms are where you are often exposed to allergens while sleeping… give them more attention than you think they need."
— Care.com
That advice applies to every room you dust. Ceiling fans and vent covers move air all day; letting dust sit there means breathing it all night.

PORTABLE CLEANING ORGANIZER: Lightweight cleaning caddy makes it simple to move supplies from room to room and is ideal for household office or professional use
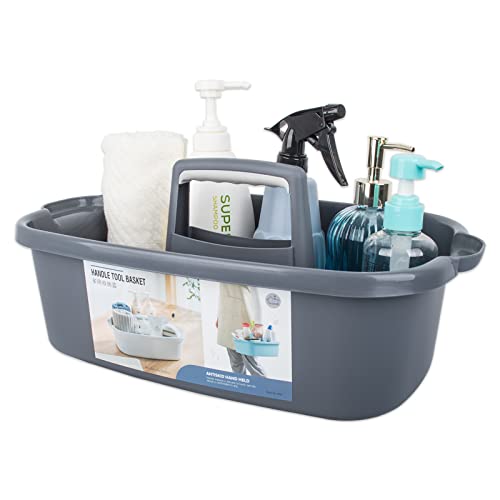
Plastic Basket Size: 16.5 in L x 9.8 in W x 6.7 in H, can hold what you need, easy to use; lightweight, easy to clean. It is a good gift choice.
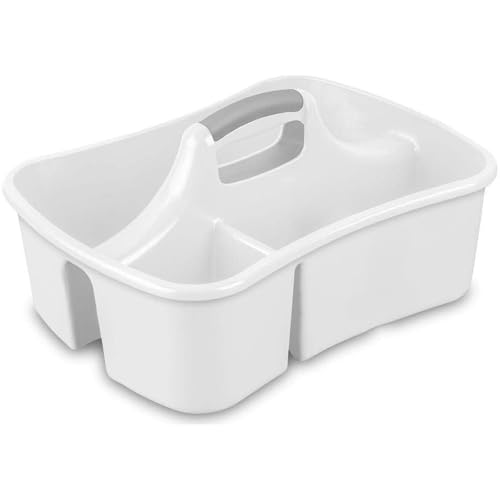
SUPER VERSATILE: Experience the versatility of our extra-large caddy, a powerhouse for cleaning supplies, shower essentials, art materials, and general organization. Its large compartment easily accommodates bulky items like shampoo bottles or paper towel rolls, while the three smaller sections neatly organize smaller items like spray bottles, brushes, and sponges. Our customers report even report using this cleaning supply caddy/bath caddy as a diaper caddy organizer
4. Clean the Floors
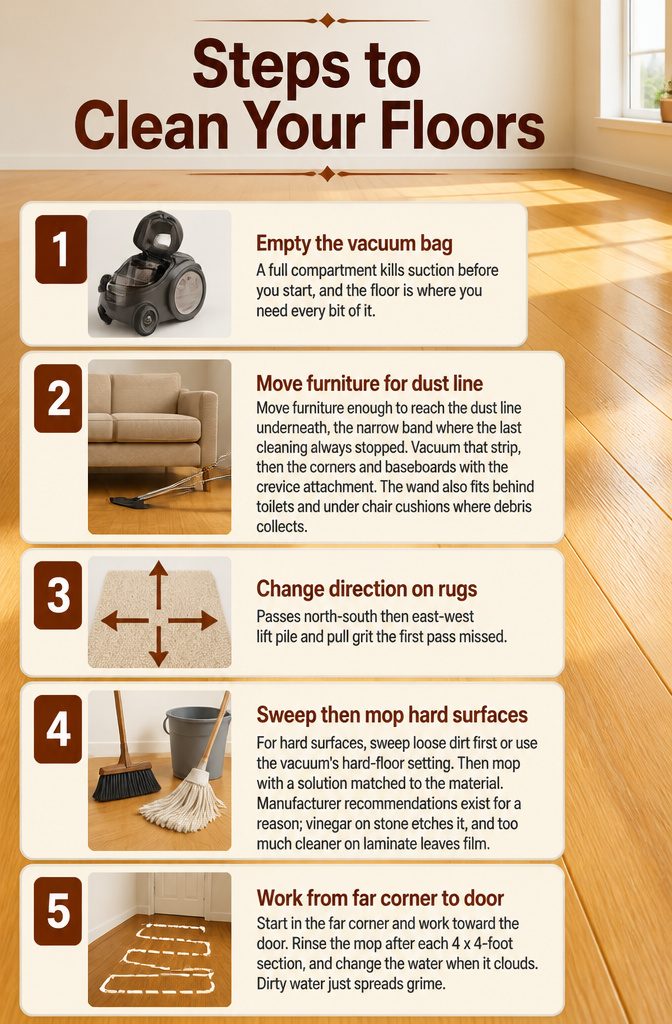
- Empty the vacuum bag or canister first. A full compartment kills suction before you start, and the floor is where you need every bit of it.
- Move furniture enough to reach the dust line underneath, the narrow band where the last cleaning always stopped. Vacuum that strip, then the corners and baseboards with the crevice attachment. The wand also fits behind toilets and under chair cushions where debris collects.
- Change direction on rugs. Passes north-south then east-west lift pile and pull grit the first pass missed.
- For hard surfaces, sweep loose dirt first or use the vacuum’s hard-floor setting. Then mop with a solution matched to the material. Manufacturer recommendations exist for a reason; vinegar on stone etches it, and too much cleaner on laminate leaves film.
- Start in the far corner and work toward the door. Rinse the mop after each 4 x 4-foot section, and change the water when it clouds. Dirty water just spreads grime.

【Streak Free & Squeak Free】: Docrok squeegee for shower glass door will effortless remove the water drops, soap scum and other sources of buildup of your shower glass door cleaner and other surfaces with just a few wipes. Getting your cleaning activities done fast and easy with no streak and squeak.

Practical Economy Set: Includes 12 16oz glass spray bottles and sprayers, 12 plastic caps, one chalk, two plastic funnels, two stainless steel funnels, 18 erasable, reusable chalk labels, a plastic dropper

REFILLABLE, AWARD-WINNING MULTI-SURFACE CLEANER. Never worry about who’s eating off the counter again. Our 100% plastic-free tablets are safer for your family (pets included!), healthier for the planet, and proven to get your surfaces sparkling clean. Just fill with water, drop in a tablet, and voila—you’re ready to fight grease and grime on everything from stovetops and countertops to wood and stone.
5. Kitchen

- Clear the counters of crumbs and debris, then wash them with a damp microfiber cloth and an all-purpose cleaner. The same cloth, rinsed well, wipes down the exterior and interior of cabinet doors and pulls.
- Clean the exterior of every appliance that handles food: stovetop, microwave inside and out, and small appliances. For the refrigerator and dishwasher, hit the handles with the same attention; they collect more bacteria than most bathroom surfaces.
- Disinfect the sink with an EPA-registered product, or use the two-step method: wash with soap and water first, then mist vinegar followed by hydrogen peroxide, letting it air dry for at least ten minutes. Never mix the two in one bottle. If the sink is stainless steel, a few drops of mineral oil on a soft cloth afterward prevents water buildup and keeps mold away longer.
- Freshen the dishwasher by running a hot water cycle with a cup of baking soda. Pour baking soda down the sink drain to control odors.
- Sweep and mop the floors, working from the far corner toward the entryway so you are not walking over what you just cleaned.

Universal attachment picks up dust like no other!

A wet dry vacuum crevice tool lets a user gets into tight spaces
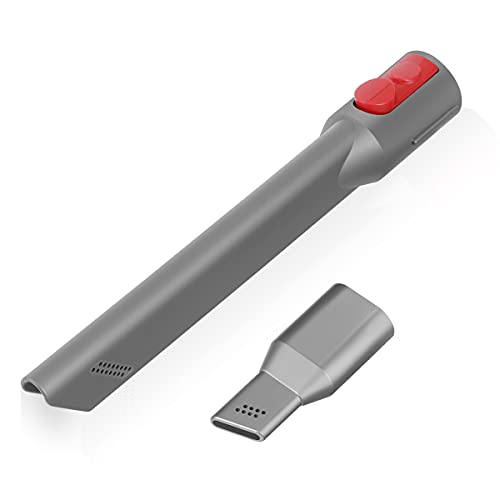
Wide Compatibility: This crevice tool with nozzle is compatible with V15 V12 V11 V10 V9 V8 V7 Gen5 G5 Outsize Cordless Vacuum (Notice: Not fit V6, DC series, and ball/canister/animal models)
6. Bathroom
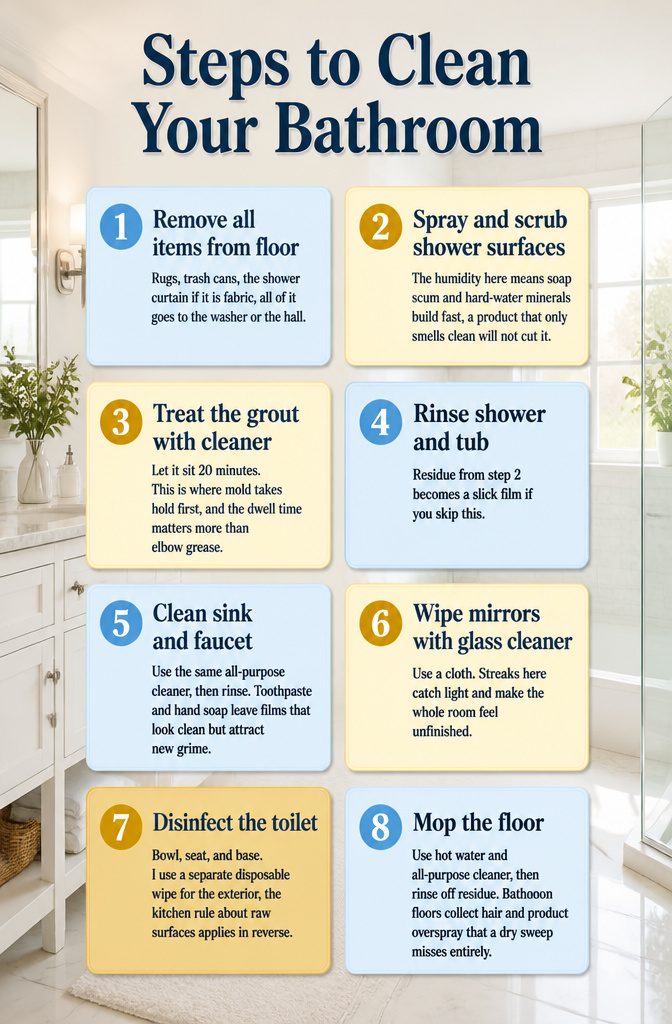
- Pull everything off the floor and out of the tub. Rugs, trash cans, the shower curtain if it is fabric, all of it goes to the washer or the hall. You cannot clean around clutter, and wet fabric left in place hides mildew you will smell later.
- Spray the shower walls, doors, and tub with an all-purpose cleaner, then scrub with a nylon pad. The humidity here means soap scum and hard-water minerals build fast; a product that only smells clean will not cut it.
- Hit the grout with a dedicated grout cleaner and let it sit 20 minutes. This is where mold takes hold first, and the dwell time matters more than elbow grease.
- Rinse the shower and tub thoroughly. Residue from step 2 becomes a slick film if you skip this.
- Clean the vanity, sink, and faucet with the same all-purpose cleaner, then rinse. Toothpaste and hand soap leave films that look clean but attract new grime.
- Wipe the mirror with glass cleaner and a cloth. Streaks here catch light and make the whole room feel unfinished.
- Disinfect the toilet bowl, seat, and base. I use a separate disposable wipe for the exterior; the kitchen rule about raw surfaces applies in reverse.
- Mop the floor with hot water and all-purpose cleaner, then rinse off residue. Bathroom floors collect hair and product overspray that a dry sweep misses entirely.


7. Other Rooms

Bedrooms, living spaces, and outdoor areas follow the same pattern: decluttered, dusted, vacuumed or swept.
The difference is lower stakes; these rooms tolerate a lighter touch and less frequent deep cleaning. A bedroom really only needs the bed made, surfaces cleared, and a quick pass with a microfiber cloth or vacuum to stay presentable.
Living rooms add the sofa cushions, which I flip weekly to even out wear and keep them looking full without buying new inserts.
Outdoor areas depend on what you have.
A small patio gets a broom, maybe a bucket of soapy water for the furniture if pollen season hit hard. I skip the pressure washer unless the concrete is actually stained; sweeping and spot-cleaning handles 90 percent of what guests notice.
A lighter schedule works here because these spaces hide less grime than kitchens or bathrooms. The bedroom floor can go two weeks between vacuums if you are not tracking in dirt, and nobody’s health depends on it.
I spend my deep-cleaning energy where bacteria actually grows, and treat these rooms as maintenance that keeps the whole house feeling done rather than spots that need rescue.

Glasses cleaner - Sourced from the highest quality microfiber that absorbs and removes dust, oil, smudges, fingerprints, dirt, and more. Leaves no scratches, streaks, marks, or lint behind. The perfect eyeglass cleaner stocking stuffers for adults, men, women, him, her, teens, and more.

【Double Glasses Case】 Features 2 slip pockets in 1 case, you can store one women sunglass and one kids sunglass in one of this soft sunglass case, perfect for carrying reading glasses, eyeglasses, glasses frames, sunglasses, regular size phones, jewelry, mobile power, makeups, keys in your handbag, easy to find and save your bag space.

ULTRA SOFT MATERIAL & SCRATCH FREE - Ultra soft and highly absorbent microfiber cleaning cloths, great for cleaning windows, kitchenware, car or other delicate surfaces.
8. Build a Cleaning Routine

A weekly schedule is the right starting point for most households, and only drop to bi-weekly or monthly when surfaces stay clean between passes. The interval depends on two things: how many people live there and how often you cook.
A single person who eats out most nights might find bi-weekly works fine after a month of testing. A couple cooking daily should stick to weekly, because grease and crumbs compound fast.
Energy matters as much as time.
One source breaks cleaning into single-task rounds: vacuum the whole house, then stop. Next session, tackle counters.
This keeps the work from ballooning into a four-hour marathon that gets postponed indefinitely. A checklist helps, but the real tool is the timer.
Set it, work until it rings, and walk away. Prevent buildup instead of trying to finish everything in one day.

REMOVABLE LEAKPROOF COOLER BAG: Don't just use cleaning caddy(12* 6.1* 8.4 Inch) for cleaning! With 9 pockets for ample storage and two foldable partitions for enhanced organization, it meets daily needs effectively. Additionally, there is a removable leakproof cooler bag (3.9* 5.9* 7 Inch) that can be detach to carry your car shampoo, sprays, etc. Overall, this cleaning bag is neater and lighter than ordinary cleaning bags, It's also your in-car storage helper

Large Cleaning Caddy for Cleaning Supplies (15.3'' L x 9.1'' W x 4.7'' H): Spacious design holds all your cleaning essentials. Easily organize and transport spray bottles, brushes, cloths, and more with this sturdy cleaning supply caddy.

Large 17L Capacity & Perfect Size:This cleaning caddy offers a spacious 17L capacity and measures 28 × 28 cm / 11 × 11 inches, providing ample room for all your essential cleaning supplies. The wide opening design allows you to see everything at a glance, ensuring quick access to cloths, bottles, sprays, and tools, making your cleaning process more efficient.
Set Up a Cleaning Station

A single shelf or closet corner is enough.
I keep a plastic caddy with the core tools: microfiber cloths and sponges for dusting and wiping, a spray bottle of all-purpose cleaner, and a toilet brush if the bathroom is on that day’s route.
A caddy you can carry room to room eliminates the start-stop of hunting for the right bottle, which is where most cleaning sessions lose their momentum.
Baskets help if you want to sort by task. One caddy might hold tub and shower cleaner, glass cleaner, and a squeegee for the bathroom; another carries polish and dusting cloths for the living area.
Organization is not the end in itself. It is having everything on hand so you do not break stride to make a supply run.
Gloves matter if you are using anything stronger than vinegar water.
A face mask is worth keeping in the caddy too, for the moments when you pull out a heavier-duty solution. Protection is part of the kit, not an afterthought.

REMOVES GREASE & GRIME: The Pink Stuff Miracle All Purpose Floor Cleaner helps cut through everyday grease, grime, dirt, and household messes on a variety of hard surfaces. This powerful cleaning solution works throughout the home to leave floors and surfaces looking clean while helping reduce the effort required for routine cleaning tasks

Discover the streak-free sparkle of Windex Fast Shine Foam, the no-drip foam glass cleaner

What to Clean in a New Home

The previous occupants’ oils and bacteria concentrate in a handful of predictable spots.
Before anything else, I would hit light switches, door handles, and cabinet pulls with a disinfectant. These high-touch surfaces transfer more grime than most people notice.
Kitchen and bathroom surfaces come next.
An empty space makes it easier to reach every corner, but this is not the moment for a full deep clean. Targeted disinfection matters more than perfection.
- Wipe down cabinet exteriors and pulls with a damp microfiber cloth and all-purpose cleaner
- Clean appliance exteriors, including the stovetop
- Run a hot water cycle in the dishwasher with a cup of baking soda
- Scrub the microwave inside and out
- Disinfect the kitchen sink and pour baking soda down the drain
- Clean and disinfect the toilet, sink, bathtub, and shower
- Wipe bathroom mirrors and fixtures, paying attention to grout and tile joints where buildup collects
Vents and filters affect air quality, though I would save those for after the move if time runs short. The goal is removing what the last person left behind, not staging a designer showcase.

Includes (1) Replace Shark Nvigator Brush and (1) Crevice Tool for Shark Navigator Vacuum

**Please confirm the size of your Shark vacuum cleaner hose before purchasing! Main Function: Use with a vacuum cleaner, you can use this dust cleaner brush set to Clean hard-to-reach areas like your carpet, bookshelf, drawers, furniture, jewelry, air vents, car vent, sofa, keyboard, personal computer, laptop, plants, remove pet hair and corners.
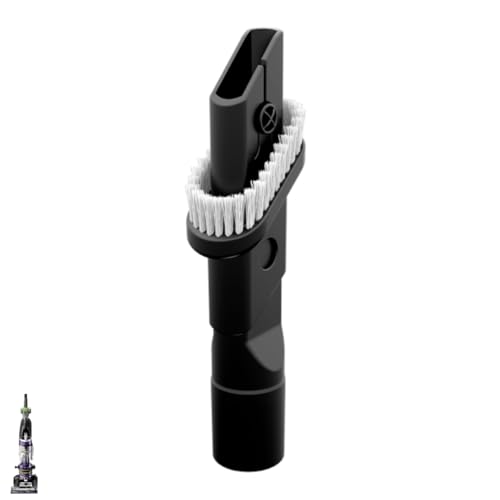
Compatibility: This tool is specifically designed to fit multiple Bissell vacuum cleaner models. It is a perfect replacement for your worn-out or lost dusting brush and crevice tool.
Involve Who You Live With

Splitting the work by who likes doing what gets better results than defaulting to old assumptions.
One of you might not mind the bathroom, while another actually finds vacuuming satisfying. I would hand out rooms that way, or let people claim the tasks they hate least.
The timer matters more than I expected.
Set it for 20 minutes and the job shrinks in your head before it shrinks in reality. The actual time spent is not what matters; 20 minutes sounds survivable to almost everyone, so people start instead of stalling.
I have watched a partner who would not touch a mop suddenly wipe down half a kitchen because the clock was running and the finish line was close.
Folding laundry straight out of the dryer takes about three minutes per load, and doing it then keeps the pile from becoming a second, worse job later.
The same principle applies to whoever empties the trash: carry a bag through every room and toss whatever you spot along the way, not just the cans. Small habits stack, but only if everyone in the house is stacking them.
What I Use and What I Skip

Microfiber cloths run about $7 for a two-pack and pay for themselves inside a month if you clean weekly.
Paper towels add up fast, leave lint on glass, and do not sanitize when wet the way microfiber does. I machine-wash mine cold, hang them to dry, and replace them once the edges fray.
| What I reach for | What it handles | What I skip and why |
|---|---|---|
| Microfiber cloths | Floors, counters, glass, tile; wet sanitizing without extra product | Paper towels; ongoing cost, streaky finish |
| All-purpose cleaner | 80% of surfaces in most rooms | n/a |
| Glass cleaner, wood cleaner, stone cleaner | Mirrors, sealed wood, natural stone | n/a |
| n/a | n/a | Disposable wipes; cost per use is high and landfill load is higher, though they do pack well for travel |
Specialized bottles for glass, wood, and stone cover the remaining 20% of surfaces. I keep them on a shelf, not the counter, so I am not tempted to grab the all-purpose spray for a granite vanity and etch the finish.
How Often Each Task Needs Doing
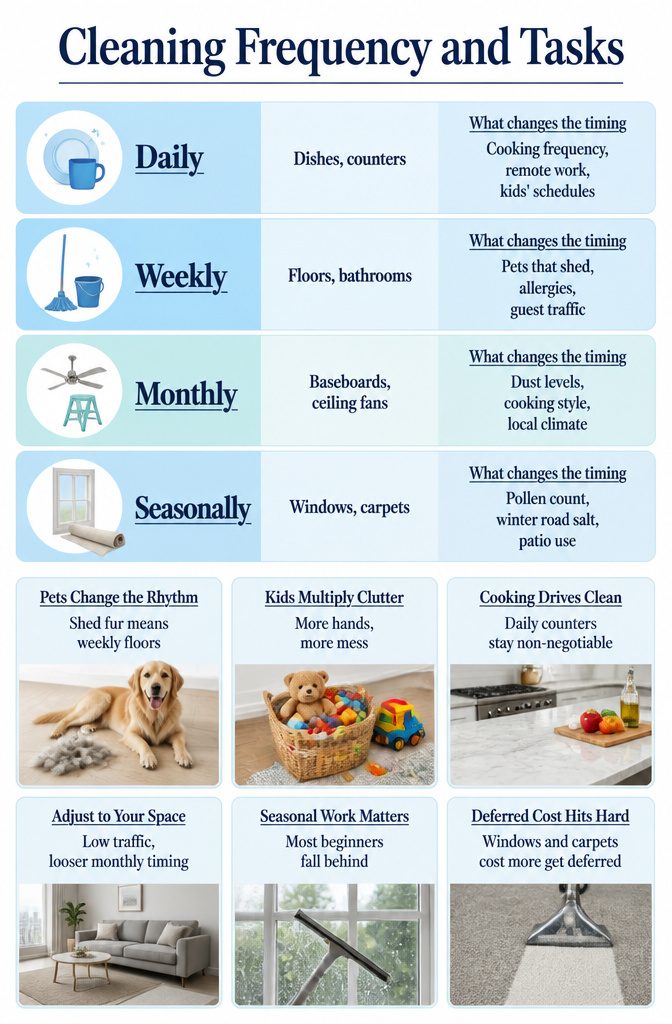
The tasks that keep a house from sliding into chaos break down into four rhythms, and the exact intervals depend on how you actually live in the space.
| Frequency | Tasks | What changes the timing |
|---|---|---|
| Daily | Dishes, counters, clutter pickup | Cooking frequency, remote work, kids’ schedules |
| Weekly | Floors, bathroom surfaces, bedding | Pets that shed, allergies, guest traffic |
| Monthly | Baseboards, ceiling fans, inside appliances | Dust levels, cooking style, local climate |
| Seasonally | Windows, carpets, outdoor spaces | Pollen count, winter road salt, patio use |
A household with a dog that sheds needs weekly floor attention, not the bi-weekly stretch that works for a single renter.
Kids multiply clutter speed; heavy cooking means daily counter attention is non-negotiable. I would rather push monthly baseboards to every six weeks in a low-traffic apartment than pretend the schedule is universal.
The seasonal work is where most beginners fall behind; windows and carpets get deferred until move-out, when the deferred cost hits all at once.
Frequently Asked Questions
What should I clean before moving into a new home?
Disinfect light switches, door handles, and cabinet pulls first, since previous occupants’ oils and bacteria concentrate on high-touch surfaces.
Next, wipe down kitchen and bathroom surfaces, clean appliance exteriors, run a hot cycle in the dishwasher with baking soda, and disinfect the sink, toilet, tub, and shower.
Targeted disinfection matters more than a full deep clean when you are still moving boxes.
How do I create a cleaning schedule?
Break tasks into single-task rounds, such as vacuuming the whole house in one session and tackling counters in the next, so work never balloons into a marathon that gets postponed.
Use a timer, work until it rings, and walk away; prevent buildup instead of trying to finish everything in one day. Start weekly and only drop to bi-weekly or monthly after testing whether surfaces stay clean between passes.
What cleaning supplies do I need to get started?
Start with microfiber cloths, an all-purpose cleaner, a separate glass cleaner, a dusting tool, a vacuum with a crevice attachment, a mop, and a bucket.
A portable caddy to carry everything room to room matters almost as much as the supplies themselves, because hunting for bottles is where momentum dies.
Add gloves only if you are using harsher products; skip specialized surface bottles unless your home actually has that material.
How often should I clean my home?
Most households do best with weekly cleaning, dropping to bi-weekly only after proving surfaces stay clean between passes. A single person who eats out might manage bi-weekly; anyone cooking daily should stick to weekly because grease and crumbs compound fast.
Daily tasks include dishes, counters, and clutter pickup; monthly tasks cover baseboards, ceiling fans, and inside appliances; seasonal work includes windows, carpets, and outdoor spaces.
What should I include on my house cleaning day list?
Declutter first by pulling everything off surfaces and sorting into keep, donate, and discard piles. Then gather supplies into one caddy, dust from top to bottom, vacuum or sweep floors, and hit kitchens and bathrooms with all-purpose cleaner and disinfectant.
Finish by mopping hard floors from the far corner toward the door so you do not walk over what you just cleaned.
How to clean a house professionally?
Work from top to bottom so gravity carries dust onto surfaces you have not yet cleaned.
Move furniture enough to reach the dust line underneath, change vacuum direction on rugs to lift pile and pull missed grit, and rinse bathroom grout thoroughly after letting cleaner sit for 20 minutes.
The same principle applies room to room: declutter, dust high surfaces, clean floors last, and never skip the rinse step that removes residue.
Is it hard to become a house cleaner?
The skills described, such as working top to bottom and keeping supplies in a portable caddy, form the foundation anyone would start from.